Difference between revisions of "Integration of MYRAbot in moveIt! (gazebo+moveIt!)"
| (50 intermediate revisions by 2 users not shown) | |||
| Line 1: | Line 1: | ||
[[Mobile manipulation | < go back to main]] | [[Mobile manipulation | < go back to main]] | ||
| − | |||
| − | === | + | ---- |
| + | {| style="border: solid 0px white; width: 100%" | ||
| + | !Related articles | ||
| + | ---- | ||
| + | !Other articles | ||
| + | ---- | ||
| + | |- | ||
| + | | valign="top" width="50%" | | ||
| + | |||
| + | [[MYRAbot's arm control (bioloid+arduino)]]<br/> | ||
| + | [[Objects recognition and position calculation (webcam)]]<br/> | ||
| + | [[MYRAbot's arm model for simulation (urdf+gazebo)]]<br/> | ||
| + | [[MYRAbot model for simulation (urdf+gazebo)]]<br/> | ||
| + | [[Voice control (sphinx+festival)]]<br/> | ||
| + | [[MYRAbot's Teleoperation with xbox360 wireless controller (xbox360 controller+joy)]] | ||
| + | |||
| + | | valign="top" | | ||
| + | |||
| + | [[CeRVaNTeS' arm and base control (maxon+epos2)]]<br/> | ||
| + | [[CeRVaNTeS' arm model for simulation (urdf+gazebo)]]<br/> | ||
| + | [[CeRVaNTeS model for simulation (urdf+gazebo)]]<br/> | ||
| + | [[Integration of CeRVaNTeS in moveIt! (gazebo+moveIt!)]]<br/> | ||
| + | [[CeRVaNTeS' Teleoperation with xbox360 wireless controller (xbox360 controller+joy)]] | ||
| + | |||
| + | |} | ||
| + | ---- | ||
| − | |||
| − | + | =Previous steps= | |
| − | == | + | ==Installation of moveIt!== |
| − | + | [http://moveit.ros.org/ MoveIt!] is a ''package'' that provides a software tool for all types of manipulation tasks both industrial level and domestic level. It is available for the [http://wiki.ros.org ROS] distributions [http://wiki.ros.org/groovy groovy] and [http://wiki.ros.org/hydro hydro], for this reason we must have installed some of these. We will execute the next command in a terminal in order to install [http://moveit.ros.org/ moveIt!], where "ROS_DISTRIBUCION" is our installed distribution: | |
| + | <syntaxhighlight>sudo apt-get install ros-ROS_DISTRIBUCION-moveit-full</syntaxhighlight> | ||
| − | + | ==Modification of MYRAbot model for moveIt!== | |
| + | ===New URDF of the arm=== | ||
| − | + | We need to modify the type of the [http://wiki.ros.org/simulator_gazebo?distro=electric gazebo] controllers of the [[MYRAbot's arm model for simulation (urdf+gazebo)|arm]]'s joints in order to allow to [http://moveit.ros.org/ moveIt!] to take the control of these. Also we have added the 3D meshes of the real components of the arm. We will create a file named "brazo-macros_moveit.xacro" within the folder "urdf" of the ''package'' "brazo_fer_modelo" with the content that is shown below: | |
<syntaxhighlight lang="xml" enclose="div"> | <syntaxhighlight lang="xml" enclose="div"> | ||
| Line 355: | Line 380: | ||
</syntaxhighlight> | </syntaxhighlight> | ||
| − | + | We will add the next files within the folder "meshes" of the ''package'' "brazo_fer_modelo": | |
* [http://www.fernando.casadogarcia.es/files/ax12_box.stl ax12_box.stl] | * [http://www.fernando.casadogarcia.es/files/ax12_box.stl ax12_box.stl] | ||
| Line 363: | Line 388: | ||
* [http://www.fernando.casadogarcia.es/files/F10.stl F10.stl] | * [http://www.fernando.casadogarcia.es/files/F10.stl F10.stl] | ||
| − | + | We will create a file named "brazo_moveit.xacro" within the folder "urdf" of the ''package'' "brazo_fer_modelo" with the content that is shown below: | |
<syntaxhighlight lang="xml" enclose="div"> | <syntaxhighlight lang="xml" enclose="div"> | ||
| Line 384: | Line 409: | ||
<link name="fixed_link"/> | <link name="fixed_link"/> | ||
| − | shoulder pan joint | + | <!-- shoulder pan joint --> |
<dynamixel_AX12_fixed parent="fixed_link" name="servo_base"> | <dynamixel_AX12_fixed parent="fixed_link" name="servo_base"> | ||
<origin xyz="0 0 0.019" rpy="${M_PI/2} 0 ${-M_PI/2}"/> | <origin xyz="0 0 0.019" rpy="${M_PI/2} 0 ${-M_PI/2}"/> | ||
| Line 392: | Line 417: | ||
</bioloid_F3_revolute> | </bioloid_F3_revolute> | ||
| − | shoulder lift joint | + | <!-- shoulder lift joint --> |
<dynamixel_AX12_fixed parent="base_brazo_link" name="servo_arti1"> | <dynamixel_AX12_fixed parent="base_brazo_link" name="servo_arti1"> | ||
<origin xyz="0 0 ${-AX12_HEIGHT-F10_HEIGHT+0.001}" rpy="0 ${M_PI} 0" /> | <origin xyz="0 0 ${-AX12_HEIGHT-F10_HEIGHT+0.001}" rpy="0 ${M_PI} 0" /> | ||
| Line 412: | Line 437: | ||
</bioloid_F3_fixed> | </bioloid_F3_fixed> | ||
| − | elbow joint | + | <!-- elbow joint --> |
<dynamixel_AX12_fixed parent="arti1_F3_0_link" name="servo_arti2"> | <dynamixel_AX12_fixed parent="arti1_F3_0_link" name="servo_arti2"> | ||
<origin xyz="0 0 ${-AX12_HEIGHT-F10_HEIGHT+0.001}" rpy="0 ${M_PI} 0"/> | <origin xyz="0 0 ${-AX12_HEIGHT-F10_HEIGHT+0.001}" rpy="0 ${M_PI} 0"/> | ||
| Line 432: | Line 457: | ||
</bioloid_F3_fixed> | </bioloid_F3_fixed> | ||
| − | wrist joint | + | <!-- wrist joint --> |
<dynamixel_AX12_fixed parent="arti2_F3_0_link" name="servo_arti3"> | <dynamixel_AX12_fixed parent="arti2_F3_0_link" name="servo_arti3"> | ||
<origin xyz="0 0 ${-AX12_HEIGHT-F10_HEIGHT+0.001}" rpy="0 ${M_PI} 0"/> | <origin xyz="0 0 ${-AX12_HEIGHT-F10_HEIGHT+0.001}" rpy="0 ${M_PI} 0"/> | ||
| Line 443: | Line 468: | ||
</bioloid_F3_fixed> | </bioloid_F3_fixed> | ||
| − | + | <!-- gripper joint --> | |
<dynamixel_AX12_fixed parent="arti3_F3_0_link" name="servo_pinza"> | <dynamixel_AX12_fixed parent="arti3_F3_0_link" name="servo_pinza"> | ||
<origin xyz="-0.02275 0 ${-AX12_WIDTH/2}" rpy="${M_PI} ${M_PI/2} 0"/> | <origin xyz="-0.02275 0 ${-AX12_WIDTH/2}" rpy="${M_PI} ${M_PI/2} 0"/> | ||
</dynamixel_AX12_fixed> | </dynamixel_AX12_fixed> | ||
| − | + | <!-- finger 1 --> | |
<joint name="pinza" type="revolute"> | <joint name="pinza" type="revolute"> | ||
<origin xyz="0 0 0" rpy="0 0 0"/> | <origin xyz="0 0 0" rpy="0 0 0"/> | ||
| Line 481: | Line 506: | ||
</finger_fixed> | </finger_fixed> | ||
| − | + | <!-- finger 2 --> | |
<bioloid_F3_fixed parent="servo_pinza_link" name="pinza_fija" color="white"> | <bioloid_F3_fixed parent="servo_pinza_link" name="pinza_fija" color="white"> | ||
<origin xyz="0 0 ${-AX12_HEIGHT-F10_HEIGHT+0.001}" rpy="0 ${M_PI} 0" /> | <origin xyz="0 0 ${-AX12_HEIGHT-F10_HEIGHT+0.001}" rpy="0 ${M_PI} 0" /> | ||
| Line 551: | Line 576: | ||
</syntaxhighlight> | </syntaxhighlight> | ||
| − | === | + | ===Controllers for arm simulation=== |
| − | + | We will create a file named "controller_moveit.yaml" within the folder "config" of the ''package'' "brazo_fer_modelo" with the content that is shown below: | |
<syntaxhighlight> | <syntaxhighlight> | ||
| Line 584: | Line 609: | ||
</syntaxhighlight> | </syntaxhighlight> | ||
| − | === | + | ===Controller for the real arm (actionlib-action server)=== |
| − | + | We need a actionlib-ActionServer that receives the calculated trajectories through a ''Goal'', subscribes the ''topic'' "pose_arm" (arm states) and publishes the ''topic'' "move_arm" (arm's movement), in order to communicate [http://moveit.ros.org/ moveIt!] with the [[MYRAbot's arm control (bioloid+arduino)|arm]]. We will create a file named "controlador_brazo.cpp" within the folder "src" of the ''package'' "brazo_fer" with the content tha is shown below: | |
| + | |||
| + | <syntaxhighlight lang="cpp" enclose="div"> | ||
| + | |||
| + | #include <ros/ros.h> | ||
| + | #include <ros/time.h> | ||
| + | #include <trajectory_msgs/JointTrajectoryPoint.h> | ||
| + | #include <trajectory_msgs/JointTrajectory.h> | ||
| + | #include <myrabot_arm_base_b/WriteServos.h> | ||
| + | #include <myrabot_arm_base_b/ReadServos.h> | ||
| + | #include <actionlib/server/simple_action_server.h> | ||
| + | #include <control_msgs/FollowJointTrajectoryAction.h> | ||
| + | |||
| + | #define PI 3.14159265 | ||
| + | |||
| + | class MYRAbotArm | ||
| + | { | ||
| + | public: | ||
| + | |||
| + | MYRAbotArm(std::string name) : | ||
| + | as_(nh_, name, false), | ||
| + | action_name_(name) | ||
| + | { | ||
| + | as_.registerGoalCallback(boost::bind(&MYRAbotArm::goalCB, this)); | ||
| + | as_.registerPreemptCallback(boost::bind(&MYRAbotArm::preemptCB, this)); | ||
| + | |||
| + | sub_pose_arm_ = nh_.subscribe("/pose_arm", 1, &MYRAbotArm::analysisCB, this); | ||
| + | |||
| + | pub_move_arm_ = nh_.advertise<myrabot_arm_base_b::WriteServos>("/move_arm", 1, this); | ||
| + | |||
| + | as_.start(); | ||
| + | } | ||
| + | |||
| + | ~MYRAbotArm(void) | ||
| + | { | ||
| + | } | ||
| + | |||
| + | void goalCB() | ||
| + | { | ||
| + | i_ = 0; | ||
| + | |||
| + | goal_ = as_.acceptNewGoal()->trajectory; | ||
| + | } | ||
| + | |||
| + | void preemptCB() | ||
| + | { | ||
| + | ROS_INFO("%s: Preempted", action_name_.c_str()); | ||
| + | as_.setPreempted(); | ||
| + | } | ||
| + | |||
| + | void analysisCB(const myrabot_arm_base_b::ReadServos& arm) | ||
| + | { | ||
| + | if (!as_.isActive()) | ||
| + | return; | ||
| + | |||
| + | ros::Time ahora = ros::Time::now(); | ||
| + | |||
| + | feedback_.header.stamp = ahora; | ||
| + | |||
| + | feedback_.joint_names.resize(4); | ||
| + | feedback_.actual.positions.resize(4); | ||
| + | feedback_.actual.effort.resize(4); | ||
| + | |||
| + | for (int i = 0; i < 4; i++) | ||
| + | { | ||
| + | switch(i) | ||
| + | { | ||
| + | case 3: | ||
| + | feedback_.joint_names[i] = "base_brazo"; | ||
| + | feedback_.actual.positions[i] = ((((arm.posicion.base * 300)/1023)*PI)/180)-2.62; | ||
| + | feedback_.actual.effort[i] = ((((arm.corriente.base * 300)/1023)*PI)/180)-2.62; | ||
| + | break; | ||
| + | case 0: | ||
| + | feedback_.joint_names[i] = "arti1"; | ||
| + | feedback_.actual.positions[i] = ((((arm.posicion.arti1 * 300)/1023)*PI)/180)-2.62; | ||
| + | feedback_.actual.effort[i] = ((((arm.corriente.arti1 * 300)/1023)*PI)/180)-2.62; | ||
| + | break; | ||
| + | case 1: | ||
| + | feedback_.joint_names[i] = "arti2"; | ||
| + | feedback_.actual.positions[i] = ((((arm.posicion.arti2 * 300)/1023)*PI)/180)-2.62; | ||
| + | feedback_.actual.effort[i] = ((((arm.corriente.arti2 * 300)/1023)*PI)/180)-2.62; | ||
| + | break; | ||
| + | case 2: | ||
| + | feedback_.joint_names[i] = "arti3"; | ||
| + | feedback_.actual.positions[i] = ((((arm.posicion.arti3 * 300)/1023)*PI)/180)-2.62; | ||
| + | feedback_.actual.effort[i] = ((((arm.corriente.arti3 * 300)/1023)*PI)/180)-2.62; | ||
| + | break; | ||
| + | } | ||
| + | } | ||
| + | |||
| + | puntos_ = goal_.points.size(); | ||
| + | |||
| + | if (i_ != puntos_) | ||
| + | { | ||
| + | |||
| + | myrabot_arm_base_b::WriteServos move; | ||
| + | |||
| + | if (i_ == 0 | ||
| + | ||((feedback_.actual.positions[0] <= (goal_.points[i_-1].positions[0] + 0.1) && feedback_.actual.positions[0] >= (goal_.points[i_-1].positions[0] - 0.1)) | ||
| + | && (feedback_.actual.positions[1] <= (goal_.points[i_-1].positions[1] + 0.1) && feedback_.actual.positions[1] >= (goal_.points[i_-1].positions[1] - 0.1)) | ||
| + | && (feedback_.actual.positions[2] <= (goal_.points[i_-1].positions[2] + 0.1) && feedback_.actual.positions[2] >= (goal_.points[i_-1].positions[2] - 0.1)) | ||
| + | && (feedback_.actual.positions[3] <= (goal_.points[i_-1].positions[3] + 0.1) && feedback_.actual.positions[3] >= (goal_.points[i_-1].positions[3] - 0.1)))) | ||
| + | { | ||
| + | for (int j = 0; j < 4; j++) | ||
| + | { | ||
| + | switch (j) | ||
| + | { | ||
| + | case 3: | ||
| + | move.posicion.base = ((((goal_.points[i_].positions[j]+2.62)*180)/PI)*1023)/300; | ||
| + | move.velocidad.base = abs(goal_.points[i_].velocities[j]*511); | ||
| + | move.par.base = 1; | ||
| + | break; | ||
| + | case 0: | ||
| + | move.posicion.arti1 = ((((goal_.points[i_].positions[j]+2.62)*180)/PI)*1023)/300; | ||
| + | move.velocidad.arti1 = abs(goal_.points[i_].velocities[j]*511); | ||
| + | move.par.arti1 = 1; | ||
| + | break; | ||
| + | case 1: | ||
| + | move.posicion.arti2 = ((((goal_.points[i_].positions[j]+2.62)*180)/PI)*1023)/300; | ||
| + | move.velocidad.arti2 = abs(goal_.points[i_].velocities[j]*511); | ||
| + | move.par.arti2 = 1; | ||
| + | break; | ||
| + | case 2: | ||
| + | move.posicion.arti3 = ((((goal_.points[i_].positions[j]+2.62)*180)/PI)*1023)/300; | ||
| + | move.velocidad.arti3 = abs(goal_.points[i_].velocities[j]*511); | ||
| + | move.par.arti3 = 1; | ||
| + | break; | ||
| + | } | ||
| + | } | ||
| + | |||
| + | pub_move_arm_.publish(move); | ||
| + | |||
| + | t_inicio = ros::Time::now(); | ||
| + | } | ||
| + | else | ||
| + | { | ||
| + | i_ = i_ - 1; | ||
| + | } | ||
| + | |||
| + | ros::Time ahora = ros::Time::now(); | ||
| + | |||
| + | ros::Duration duracion(1.0); | ||
| + | |||
| + | if (ahora > (t_inicio + duracion)) | ||
| + | { | ||
| + | result_.error_code = -1; | ||
| + | as_.setAborted(result_); | ||
| + | } | ||
| + | |||
| + | feedback_.desired = goal_.points[i_]; | ||
| + | |||
| + | feedback_.error.positions.resize(4); | ||
| + | |||
| + | for (int j = 0; j < 4; j++) | ||
| + | { | ||
| + | feedback_.error.positions[j] = feedback_.desired.positions[j] - feedback_.actual.positions[j]; | ||
| + | } | ||
| + | |||
| + | i_ ++; | ||
| + | } | ||
| + | else | ||
| + | { | ||
| + | result_.error_code = 0; | ||
| + | as_.setSucceeded(result_); | ||
| + | } | ||
| + | as_.publishFeedback(feedback_); | ||
| + | |||
| + | } | ||
| + | |||
| + | protected: | ||
| + | |||
| + | ros::NodeHandle nh_; | ||
| + | actionlib::SimpleActionServer<control_msgs::FollowJointTrajectoryAction> as_; | ||
| + | std::string action_name_; | ||
| + | int puntos_, i_; | ||
| + | ros::Time t_inicio; | ||
| + | trajectory_msgs::JointTrajectory goal_; | ||
| + | control_msgs::FollowJointTrajectoryResult result_; | ||
| + | control_msgs::FollowJointTrajectoryFeedback feedback_; | ||
| + | ros::Subscriber sub_pose_arm_; | ||
| + | ros::Publisher pub_move_arm_; | ||
| + | }; | ||
| + | |||
| + | int main(int argc, char** argv) | ||
| + | { | ||
| + | ros::init(argc, argv, "brazo_controller/follow_join_trajectory"); | ||
| + | |||
| + | MYRAbotArm brazo(ros::this_node::getName()); | ||
| + | ros::spin(); | ||
| + | |||
| + | return 0; | ||
| + | } | ||
| + | |||
| + | </syntaxhighlight> | ||
| + | |||
| + | We have to add the next code line in the file "CMakeLists.txt" of the ''package'' in order to compile and generate the executable: | ||
| + | |||
| + | <syntaxhighlight lang=cmake>rosbuild_add_executable(controlador_brazo src/controlador_brazo.cpp)</syntaxhighlight> | ||
| + | |||
| + | Also, we need to add the next dependences for the ''package'' in the file "manifest.xml": | ||
| + | |||
| + | <syntaxhighlight>actionlib | ||
| + | actionlib_msgs | ||
| + | trajectory_msgs | ||
| + | control_msgs</syntaxhighlight> | ||
| + | |||
| + | We will execute the next commands in a terminal in order to compile and generate the executable: | ||
| + | |||
| + | <syntaxhighlight>roscd brazo_fer | ||
| + | make</syntaxhighlight> | ||
| + | |||
| + | ===New URDF for xtion camera and frame=== | ||
| + | |||
| + | We have added a frame to MYRAbot in order to place the new [http://www.asus.com/Multimedia/Xtion_PRO_LIVE/ asus Xtion PRO LIVE] camera which replaces the previous [[Objects recognition and position calculation (webcam)|webcam]]. We will add the next code lines to the file "estructura-myrabot.xacro" placed within the folder "urdf" of the ''package'' "myrabot_fer_modelo" in order to add the camera frame: | ||
<syntaxhighlight lang="xml" enclose="div"> | <syntaxhighlight lang="xml" enclose="div"> | ||
| Line 627: | Line 865: | ||
</syntaxhighlight> | </syntaxhighlight> | ||
| − | + | We will create a file named "xtion.xacro" within the folder "urdf" of the ''package'' "myrabot_fer_modelo" with the content that is shown below in order to create the model of the 3D sensor: | |
<syntaxhighlight lang="xml" enclose="div"> | <syntaxhighlight lang="xml" enclose="div"> | ||
| Line 634: | Line 872: | ||
<robot xmlns:xacro="http://ros.org/wiki/xacro"> | <robot xmlns:xacro="http://ros.org/wiki/xacro"> | ||
| − | + | <!-- Xacro properties --> | |
<xacro:property name="M_SCALE" value="0.001"/> | <xacro:property name="M_SCALE" value="0.001"/> | ||
<xacro:property name="asus_xtion_pro_depth_rel_rgb_py" value="0.0270" /> | <xacro:property name="asus_xtion_pro_depth_rel_rgb_py" value="0.0270" /> | ||
| Line 641: | Line 879: | ||
<property name="M_PI" value="3.14159"/> | <property name="M_PI" value="3.14159"/> | ||
| − | + | <!-- Parameterised in part by the values in turtlebot_properties.urdf.xacro --> | |
<xacro:macro name="xtion" params="parent *origin"> | <xacro:macro name="xtion" params="parent *origin"> | ||
| Line 778: | Line 1,016: | ||
</syntaxhighlight> | </syntaxhighlight> | ||
| − | + | We will add the next files within the folder "meshes" of the ''package'' "myrabot_fer_modelo": | |
| − | |||
* [http://www.fernando.casadogarcia.es/files/e_soporte_3.stl e_soporte_3.stl] | * [http://www.fernando.casadogarcia.es/files/e_soporte_3.stl e_soporte_3.stl] | ||
| Line 785: | Line 1,022: | ||
* [http://www.fernando.casadogarcia.es/images/asus_xtion_pro_live.png asus_xtion_pro_live.png] | * [http://www.fernando.casadogarcia.es/images/asus_xtion_pro_live.png asus_xtion_pro_live.png] | ||
| − | === | + | ===New URDF of MYRAbot=== |
| − | + | As well we have to create a file named "myrabot_moveit.urdf.xacro" within the folder "urdf" of the ''package'' "myrabot_fer_modelo" with the content that is show below in order to add to the [[MYRAbot model for simulation (urdf+gazebo)|MYRAbot model]] the new [[MYRAbot's arm model for simulation (urdf+gazebo)|arm model]]: | |
<syntaxhighlight lang="xml" enclose="div"> | <syntaxhighlight lang="xml" enclose="div"> | ||
| Line 862: | Line 1,099: | ||
</syntaxhighlight> | </syntaxhighlight> | ||
| − | + | We will create a file named "myrabot_gazebo_moveit.launcher" within the folder "launch" of the ''package'' "myrabot_fer_modelo" with the content that is shown below in order to load in [http://wiki.ros.org/simulator_gazebo?distro=electric gazebo] the new robot model adapted to [http://moveit.ros.org/ moveIt!]: | |
<syntaxhighlight lang="xml" enclose="div"> | <syntaxhighlight lang="xml" enclose="div"> | ||
| Line 875: | Line 1,112: | ||
</include> | </include> | ||
| − | <param name="robot_description" command="$(find xacro)/xacro.py '$(find | + | <param name="robot_description" command="$(find xacro)/xacro.py '$(find myrabot_fer_modelo)/urdf/myrabot_moveit.urdf.xacro'" /> |
<node name="spawn_myrabot" pkg="gazebo_ros" type="spawn_model" args="-urdf -param robot_description -model MYRAbot" respawn="false" output="screen" /> | <node name="spawn_myrabot" pkg="gazebo_ros" type="spawn_model" args="-urdf -param robot_description -model MYRAbot" respawn="false" output="screen" /> | ||
| Line 906: | Line 1,143: | ||
<node pkg="nodelet" type="nodelet" name="kinect_laser" args="load pointcloud_to_laserscan/CloudToScan openni_manager" respawn="true"> | <node pkg="nodelet" type="nodelet" name="kinect_laser" args="load pointcloud_to_laserscan/CloudToScan openni_manager" respawn="true"> | ||
<param name="output_frame_id" value="/camera_depth_frame"/> | <param name="output_frame_id" value="/camera_depth_frame"/> | ||
| − | + | <!-- heights are in the (optical?) frame of the kinect --> | |
<param name="min_height" value="-0.15"/> | <param name="min_height" value="-0.15"/> | ||
<param name="max_height" value="0.15"/> | <param name="max_height" value="0.15"/> | ||
| Line 914: | Line 1,151: | ||
<node pkg="nodelet" type="nodelet" name="kinect_laser_narrow" args="load pointcloud_to_laserscan/CloudToScan openni_manager" respawn="true"> | <node pkg="nodelet" type="nodelet" name="kinect_laser_narrow" args="load pointcloud_to_laserscan/CloudToScan openni_manager" respawn="true"> | ||
<param name="output_frame_id" value="/camera_depth_frame"/> | <param name="output_frame_id" value="/camera_depth_frame"/> | ||
| − | + | <!-- heights are in the (optical?) frame of the kinect --> | |
<param name="min_height" value="-0.025"/> | <param name="min_height" value="-0.025"/> | ||
<param name="max_height" value="0.025"/> | <param name="max_height" value="0.025"/> | ||
| Line 925: | Line 1,162: | ||
</syntaxhighlight> | </syntaxhighlight> | ||
| − | = | + | =Configuration of MYRAbot in moveIt!= |
| − | == | + | ==Setup assistant== |
| − | + | We will execute the next command in a terminal in order to start the setup assistant of [http://moveit.ros.org/ moveIt!]: | |
<syntaxhighlight>roslaunch moveit_setup_assistant setup_assistant.launch</syntaxhighlight> | <syntaxhighlight>roslaunch moveit_setup_assistant setup_assistant.launch</syntaxhighlight> | ||
| − | + | We can choose between "Create New MoveIt Configuration Package" or "Edit existing MoveIt Configuration Package" in the assistant window that is shown below: | |
| − | |||
{| style="border: solid 0px white; width: 100%" | {| style="border: solid 0px white; width: 100%" | ||
| Line 941: | Line 1,177: | ||
| | | | ||
|- | |- | ||
| − | |[[file:myrabot_moveit_asistente_01.png|thumb|400px|center| | + | |[[file:myrabot_moveit_asistente_01.png|thumb|400px|center|[http://moveit.ros.org/ MoveIt!] setup asistant start window]] |
| − | ||<center style="text-align: left"> | + | ||<center style="text-align: left">Click on "Create New MoveIt Configuration Package" > |
| − | <br><br> | + | <br><br>Select the [http://wiki.ros.org/urdf/Tutorials URDF] file of the [[MYRAbot model for simulation (urdf+gazebo)|MYRAbot model]] clicking on "Browse" ></center> |
| − | |||[[file:myrabot_moveit_asistente_02.png|thumb|400px|center| | + | |||[[file:myrabot_moveit_asistente_02.png|thumb|400px|center|Creation of New [http://moveit.ros.org/ moveIt!] Configuration Package window]] |
|} | |} | ||
| − | + | We will click on "Load Files" in order to load our robot model in the [http://moveit.ros.org/ moveIt!] setup assistant. When the load process ends, we can see in the right side of the window the robot model. This is shown in the next picture: | |
| − | [[file:myrabot_moveit_asistente_03.png|thumb|400px|center| | + | [[file:myrabot_moveit_asistente_03.png|thumb|400px|center|[http://moveit.ros.org/ MoveIt!] setup assistant load model window]] |
| − | + | Now, we will select "Self-Collision" in the menu of the left side of the window and we will click on "Regenerate Default Collision Mtrix" in order to calculate the collision matrix of our model. The result is shown in the next picture: | |
| − | [[file:myrabot_moveit_asistente_04.png|thumb|400px|center| | + | [[file:myrabot_moveit_asistente_04.png|thumb|400px|center|[http://moveit.ros.org/ MoveIt!] setup assistant Self-Collision window]] |
| − | |||
| − | |||
| + | We will select "Virtual Joints" in the menu of the left side of the window and we will click on "Add Virtual Joint". We will write '''virtual_joint''' in the field "Virtual Joint Name", we will select the ''link'' '''base_footprint''' in the field "Child_Link", we will write '''odom''' in the field "Parent Frame Name" and we will write '''planar''' in the field. The procedure is shown in the next pictures: | ||
{| style="border: solid 0px white; width: 100%" | {| style="border: solid 0px white; width: 100%" | ||
| Line 963: | Line 1,198: | ||
| | | | ||
|- | |- | ||
| − | |[[file:myrabot_moveit_asistente_05.png|thumb|400px|center| | + | |[[file:myrabot_moveit_asistente_05.png|thumb|400px|center|[http://moveit.ros.org/ MoveIt!] setup assistant "Add Virtual Joint" window]] |
| − | ||<center style="text-align: left"> | + | ||<center style="text-align: left">Click on "Save" to add the "Virtual Joint"></center> |
| − | |||[[file:myrabot_moveit_asistente_06.png|thumb|400px|center| | + | |||[[file:myrabot_moveit_asistente_06.png|thumb|400px|center|[http://moveit.ros.org/ MoveIt!] setup assistant "Virtual Joints" window]] |
|} | |} | ||
| − | + | We will select "Planning Groups" in the menu of the left side of the window and we will click on "Add Group". We will write '''brazo''' in the field "Group Name", we will select '''kdl_kinematics_plugin/KDLKinematicsPlugin''' in the field "Kinematic Solver" and we will leave the rest of fields with the default value. The procedure is shown in the next pictures: | |
{| style="border: solid 0px white; width: 100%" | {| style="border: solid 0px white; width: 100%" | ||
| Line 975: | Line 1,210: | ||
| | | | ||
|- | |- | ||
| − | |[[file:myrabot_moveit_asistente_07.png|thumb|300px|center| | + | |[[file:myrabot_moveit_asistente_07.png|thumb|300px|center|[http://moveit.ros.org/ MoveIt!] setup assistant "Add Group" window]] |
| − | ||<center style="text-align: left"> | + | ||<center style="text-align: left">Click on "Add Joints" to add the group joints> |
| − | <br><br> | + | <br><br>Select from the list the joints of the arm (<font style="font-weight: bold">base, arti1, arti2, arti3</font>)></center> |
| − | |||[[file:myrabot_moveit_asistente_08.png|thumb|300px|center| | + | |||[[file:myrabot_moveit_asistente_08.png|thumb|300px|center|[http://moveit.ros.org/ MoveIt!] setup assistant "Add Joints" to "Group" window]] |
| − | ||||<center style="text-align: left"> | + | ||||<center style="text-align: left">Click on "Save" to add "Joints" and "Group"></center> |
| − | |||||[[file:myrabot_moveit_asistente_09.png|thumb|300px|center| | + | |||||[[file:myrabot_moveit_asistente_09.png|thumb|300px|center|[http://moveit.ros.org/ MoveIt!] setup assistant "Planning Group" window]] |
|} | |} | ||
| − | + | ||
| + | As well we must add the gripper group clicking on "Add Group". We will write '''pinza''' in the field "Group Name", we will select '''None''' in the field "Kinematic Solver" and we will leave the rest of fields with the default value. The procedure is shown in the next pictures: | ||
{| style="border: solid 0px white; width: 100%" | {| style="border: solid 0px white; width: 100%" | ||
| Line 989: | Line 1,225: | ||
| | | | ||
|- | |- | ||
| − | |[[file:myrabot_moveit_asistente_10.png|thumb|300px|center| | + | |[[file:myrabot_moveit_asistente_10.png|thumb|300px|center|[http://moveit.ros.org/ MoveIt!] setup assistant "Add Group" window]] |
| − | ||<center style="text-align: left"> | + | ||<center style="text-align: left">Click on "Add Links" to add the group links> |
| − | <br><br> | + | <br><br>Select from the list the links of the gripper></center> |
| − | |||[[file:myrabot_moveit_asistente_11.png|thumb|300px|center| | + | |||[[file:myrabot_moveit_asistente_11.png|thumb|300px|center|[http://moveit.ros.org/ MoveIt!] setup assistant "Add Links" to "Group" window]] |
| − | ||||<center style="text-align: left"> | + | ||||<center style="text-align: left">Click on "Save" to add "Links" and "Group"></center> |
| − | |||||[[file:myrabot_moveit_asistente_12.png|thumb|300px|center| | + | |||||[[file:myrabot_moveit_asistente_12.png|thumb|300px|center|[http://moveit.ros.org/ MoveIt!] setup assistant "Planning Group" window]] |
|} | |} | ||
| − | + | We can store regular poses for the arm group in order to set this poses in the future. We will select "Robot Poses" in the menu of the left side of the window and we will click on "Add Pose". We will write '''home''' in the field "Pose Name" and we will select '''brazo''' in the field "Planning Group". We can modify the position of each joint using the slider. The procedure is shown in the next pictures: | |
{| style="border: solid 0px white; width: 100%" | {| style="border: solid 0px white; width: 100%" | ||
| Line 1,004: | Line 1,240: | ||
| | | | ||
|- | |- | ||
| − | |[[file:myrabot_moveit_asistente_13.png|thumb|400px|center| | + | |[[file:myrabot_moveit_asistente_13.png|thumb|400px|center|[http://moveit.ros.org/ MoveIt!] setup assistant "Add Pose" window]] |
| − | ||<center style="text-align: left"> | + | ||<center style="text-align: left">Click on "Save" to add the "Robot Pose"></center> |
| − | |||[[file:myrabot_moveit_asistente_14.png|thumb|400px|center| | + | |||[[file:myrabot_moveit_asistente_14.png|thumb|400px|center|[http://moveit.ros.org/ MoveIt!] setup assistant "Robot Pose" window]] |
|} | |} | ||
| − | + | We will select "End Effectors" in the menu of the left side of the window and we will click on "Add End Effector". We will write '''pinza_eef''' in the field "End Effector Name", we will select ''''pinza''' in the field "End Effector Group", we will select '''arti3_link''' in the field "Parent Link" and we will leave blank the field "Parent Group". The procedure is shown in the next pictures: | |
{| style="border: solid 0px white; width: 100%" | {| style="border: solid 0px white; width: 100%" | ||
| Line 1,016: | Line 1,252: | ||
| | | | ||
|- | |- | ||
| − | |[[file:myrabot_moveit_asistente_15.png|thumb|400px|center| | + | |[[file:myrabot_moveit_asistente_15.png|thumb|400px|center|[http://moveit.ros.org/ MoveIt!] setup assistant "Add End Effector" window]] |
| − | ||<center style="text-align: left"> | + | ||<center style="text-align: left">Click on "Save" to add the "End Effector"></center> |
| − | |||[[file:myrabot_moveit_asistente_16.png|thumb|400px|center| | + | |||[[file:myrabot_moveit_asistente_16.png|thumb|400px|center|[http://moveit.ros.org/ MoveIt!] setup assistant "End Effectors" window]] |
|} | |} | ||
| + | To finish, we will select "Configuration Files" in the menu of the left side of the window and we will click on "Browse" in order to select the path and the name for the configuration ''package''. We will click on "Generate Package" to generate the ''package''. The result is shown in the next picture: | ||
| − | + | [[file:myrabot_moveit_asistente_18.png|thumb|400px|center|[http://moveit.ros.org/ MoveIt!] setup assistant final window]] | |
| − | |||
| − | [[file:myrabot_moveit_asistente_18.png|thumb|400px|center| | ||
| − | == | + | ==Integration of arm's controllers== |
| − | + | We will create a file named "controllers.yaml" within the folder "config" of the generated [http://moveit.ros.org/ moveIt!] ''package'' with the content that is show below: | |
<syntaxhighlight> | <syntaxhighlight> | ||
| Line 1,044: | Line 1,279: | ||
</syntaxhighlight> | </syntaxhighlight> | ||
| − | + | We have to add the nest code lines in the file "MYRAbot_moveit_controller_manager.launch.xml" placed in the folder "launch" of the generated [http://moveit.ros.org/ moveIt!] ''package'': | |
<syntaxhighlight lang="xml" enclose="div"> | <syntaxhighlight lang="xml" enclose="div"> | ||
| Line 1,061: | Line 1,296: | ||
</syntaxhighlight> | </syntaxhighlight> | ||
| − | == | + | ==Integration of perception sensors== |
| − | + | We can use the [http://www.asus.com/Multimedia/Xtion_PRO_LIVE/ asus xtion pro live] or the [http://www.microsoft.com/en-us/kinectforwindows/ kinect] in MYRAbot, we configure both in the same way. We will create a file named "xtion.yaml" within the folder "config" of the generated [http://moveit.ros.org/ moveIt!] ''package'' with the content that is shown below: | |
<syntaxhighlight> | <syntaxhighlight> | ||
| Line 1,078: | Line 1,313: | ||
</syntaxhighlight> | </syntaxhighlight> | ||
| − | + | We have to add the nest code lines in the file "MYRAbot_moveit_sensor_manager.launch.xml" placed in the folder "launch" of the generated [http://moveit.ros.org/ moveIt!] ''package'': | |
<syntaxhighlight lang="xml" enclose="div"> | <syntaxhighlight lang="xml" enclose="div"> | ||
| Line 1,093: | Line 1,328: | ||
</syntaxhighlight> | </syntaxhighlight> | ||
| − | + | We have to add the value '''move_group/MoveGroupGetPlanningSceneService'' in the parameter "papabilities" in the file "move_group.launch" placed in the folder "launch" of the generated [http://moveit.ros.org/ moveIt!] ''package'', like is shown below: | |
<syntaxhighlight lang="xml" enclose="div"> | <syntaxhighlight lang="xml" enclose="div"> | ||
| Line 1,115: | Line 1,350: | ||
</syntaxhighlight> | </syntaxhighlight> | ||
| − | == | + | ==Modification of the .srdf file generated== |
| − | + | We have to edit the generated file "MYRAbot.srdf" placed in the folder "config" of the generated [http://moveit.ros.org/ moveIt!] ''package'' in order to replace the commas by dots in the values of the joints in the stored group poses, like is shown below: | |
<syntaxhighlight lang="xml" enclose="div"> | <syntaxhighlight lang="xml" enclose="div"> | ||
| Line 1,128: | Line 1,363: | ||
</group_state> | </group_state> | ||
| − | + | by | |
<group_state name="home" group="brazo"> | <group_state name="home" group="brazo"> | ||
| Line 1,139: | Line 1,374: | ||
</syntaxhighlight> | </syntaxhighlight> | ||
| − | = | + | =Execution= |
| − | == | + | ==Simple planning== |
| − | + | We will execute the next command in a terminal in order to test that the MYRAbot works properly in [http://moveit.ros.org/ moveIt!]: | |
<syntaxhighlight>roslaunch myrabot_moveit_generated demo.launch</syntaxhighlight> | <syntaxhighlight>roslaunch myrabot_moveit_generated demo.launch</syntaxhighlight> | ||
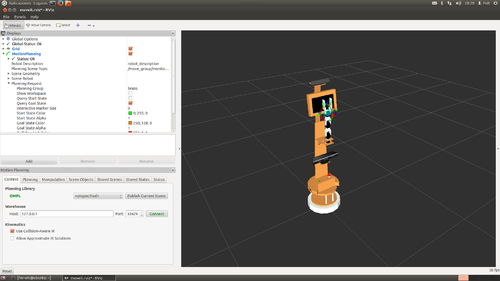
| − | + | When the load process finish we can see the MYRAbot model in [http://wiki.ros.org/rviz rviz] with the Motion Planning Interface of [http://moveit.ros.org/ moveIt!], like is shown in the next picture: | |
| − | [[file:myrabot_moveit_plugin_rviz.png|thumb|500px|center|MYRAbot | + | [[file:myrabot_moveit_plugin_rviz.png|thumb|500px|center|MYRAbot in [http://wiki.ros.org/rviz rviz] with ''plugin'' of [http://moveit.ros.org/ moveIt!]]] |
| − | + | If the interact mode is selected we can see a ''interactive markers'' around the gripper. We will use the interactive markers to interact with the representation of the start state and the goal state. If we open '''Planning Request''' within of '''MotionPlanning''' we can show or hide the representation of '''Query Start State''' (arm's joints green-coloured) and '''Query Goal State''' (arm's joints orange-coloured). When a part of the arm collides with other part of the robot or other object, its colour change to red. | |
| − | + | We can see in the next video a simple planning, without obstacles, that moves the arm from a start pose (stored pose home) until a goal pose (using the interactive marker): | |
<center><videoflash>doy6VRjzYZc</videoflash></center> | <center><videoflash>doy6VRjzYZc</videoflash></center> | ||
| − | <center>[http://www.youtube.com/watch?v=doy6VRjzYZc | + | <center>[http://www.youtube.com/watch?v=doy6VRjzYZc Watch in YouTube]</center> |
| − | == | + | ==Planning with modelled scene== |
| − | + | We will execute the next command in a terminal in order to start [http://wiki.ros.org/rviz rviz] with the robot model and the "MotionPlanning" of [http://moveit.ros.org/ moveIt!]: | |
<syntaxhighlight>roslaunch myrabot_moveit_generated demo.launch</syntaxhighlight> | <syntaxhighlight>roslaunch myrabot_moveit_generated demo.launch</syntaxhighlight> | ||
| − | + | We have created a scene with basic geometry figures that represent a table and a can. We have not used 3D meshes because they may swap randomly. We will create a file named "mesa_lata.scene" within our personal folder with the content that is shown below: | |
| − | |||
<syntaxhighlight> | <syntaxhighlight> | ||
| Line 1,217: | Line 1,451: | ||
</syntaxhighlight> | </syntaxhighlight> | ||
| − | + | We will load the scene clicking on '''Import From Text''' in the menu '''Scene Objects''' of '''MotionPlanning'''. We can see in the next video the load process and planning to avoid the can that is represents by a red cylinder over the table: | |
<center><videoflash>oWe_jj4keXU</videoflash></center> | <center><videoflash>oWe_jj4keXU</videoflash></center> | ||
| − | <center>[http://www.youtube.com/watch?v=oWe_jj4keXU | + | <center>[http://www.youtube.com/watch?v=oWe_jj4keXU Watch in YouTube]</center> |
| − | == | + | ==Planning with robot in gazebo== |
| − | + | We will create a file named "myrabot_gazebo_moveit_mesa+latas.launch" within the folder "launch" of the ''package'' "myrabot_fer_modelo" with the content that is shown below in order to load [[MYRAbot model for simulation (urdf+gazebo)#Creation of the objects' models|the objects' models]] (table and cans): | |
<syntaxhighlight lang="xml" enclose="div"> | <syntaxhighlight lang="xml" enclose="div"> | ||
| Line 1,242: | Line 1,476: | ||
</launch> | </launch> | ||
| − | </syntaxhighlight> | + | </syntaxhighlight> |
| − | + | We will create a file named "moveit_planning_execution.launch" within the folder "launch" of the created [http://moveit.ros.org/ moveIt!] ''package'' with the content that is shown below: | |
<syntaxhighlight lang="xml" enclose="div"> | <syntaxhighlight lang="xml" enclose="div"> | ||
| Line 1,259: | Line 1,493: | ||
</launch> | </launch> | ||
| − | </syntaxhighlight> | + | </syntaxhighlight> |
| − | + | We will execute the next command in a terminal in order to start [http://wiki.ros.org/simulator_gazebo?distro=electric gazebo] with the robot model and objects' models: | |
| − | <syntaxhighlight>roslaunch | + | <syntaxhighlight>roslaunch myrabot_fer_modelo myrabot_gazebo_moveit_mesa+latas.launch</syntaxhighlight> |
| − | + | We will execute the next command in a new terminal in order to start [http://wiki.ros.org/rviz rviz] with the "Motion Planning Interface" of [http://moveit.ros.org/ moveIt!]: | |
<syntaxhighlight>roslaunch myrabot_moveit_generated moveit_planning_execution.launch</syntaxhighlight> | <syntaxhighlight>roslaunch myrabot_moveit_generated moveit_planning_execution.launch</syntaxhighlight> | ||
| − | + | The represented scene in [http://wiki.ros.org/rviz rviz] corresponds with the scene captured by the perception sensor, the boxes represent the occupied space. We can see in the next video the planning to avoid the can and the replanning because the first calculated trajectory collides with the can: | |
<center><videoflash>xf1Jz1L-Xyc</videoflash></center> | <center><videoflash>xf1Jz1L-Xyc</videoflash></center> | ||
| − | <center>[http://www.youtube.com/watch?v=xf1Jz1L-Xyc | + | <center>[http://www.youtube.com/watch?v=xf1Jz1L-Xyc Watch in YouTube]</center> |
| + | |||
| + | ==Simple planning with real robot== | ||
| + | |||
| + | We need load the robot model and start the arm controller for [http://moveit.ros.org/ moveIt!]. We will create a file named "controlador_moveit.launch" within the folder "launch" of the ''package'' "brazo_fer" with the content that is shown below: | ||
| + | |||
| + | <syntaxhighlight lang="xml" enclose="div"> | ||
| + | |||
| + | <launch> | ||
| + | |||
| + | <param name="robot_description" command="$(find xacro)/xacro.py '$(find myrabot_fer_modelo)/urdf/myrabot_moveit.urdf.xacro'" /> | ||
| + | |||
| + | <node name="robot_state_publisher" pkg="robot_state_publisher" type="state_publisher"></node> | ||
| + | |||
| + | <node name="serial_node" pkg="rosserial_python" type="serial_node.py" args="/dev/ttyACM0" /> | ||
| + | |||
| + | <node name="joint_states_brazo" pkg="brazo_fer" type="joint_states_brazo" /> | ||
| + | |||
| + | <group ns="brazo_controller"> | ||
| + | |||
| + | <node name="follow_joint_trajectory" pkg="brazo_fer" type="controlador_moveit" output="screen" /> | ||
| + | |||
| + | </group> | ||
| + | |||
| + | </launch> | ||
| + | |||
| + | </syntaxhighlight> | ||
| + | |||
| + | We will execute the next command in a terminal in order to start the arm control: | ||
| + | |||
| + | <syntaxhighlight>roslaunch brazo_fer controlador_moveit.launch</syntaxhighlight> | ||
| + | |||
| + | In a new terminal we will execute the next command in order to start [http://wiki.ros.org/rviz rviz] with the "Motion Planning Interface" of [http://moveit.ros.org/ moveIt!] | ||
| + | |||
| + | <syntaxhighlight>roslaunch myrabot_moveit_generated moveit_planning_execution.launch</syntaxhighlight> | ||
| + | |||
| + | We can see in the next video the real arm executing the planned trajectories in order to reach the positions that we have indicated on robot model using ''interactive markers'': | ||
| + | |||
| + | <center><videoflash>Kz7bKL4ZP98</videoflash></center> | ||
| + | |||
| + | <center>[http://www.youtube.com/watch?v=Kz7bKL4ZP98 Watch in YouTube]</center> | ||
| + | |||
| + | |||
| + | ---- | ||
| + | {| style="border: solid 0px white; width: 100%" | ||
| + | !Related articles | ||
| + | ---- | ||
| + | !Other articles | ||
| + | ---- | ||
| + | |- | ||
| + | | valign="top" width="50%" | | ||
| + | |||
| + | [[MYRAbot's arm control (bioloid+arduino)]]<br/> | ||
| + | [[Objects recognition and position calculation (webcam)]]<br/> | ||
| + | [[MYRAbot's arm model for simulation (urdf+gazebo)]]<br/> | ||
| + | [[MYRAbot model for simulation (urdf+gazebo)]]<br/> | ||
| + | [[Voice control (sphinx+festival)]]<br/> | ||
| + | [[MYRAbot's Teleoperation with xbox360 wireless controller (xbox360 controller+joy)]] | ||
| + | |||
| + | | valign="top" | | ||
| + | |||
| + | [[CeRVaNTeS' arm and base control (maxon+epos2)]]<br/> | ||
| + | [[CeRVaNTeS' arm model for simulation (urdf+gazebo)]]<br/> | ||
| + | [[Integration of CeRVaNTeS in moveIt! (gazebo+moveIt!)]]<br/> | ||
| + | [[CeRVaNTeS' Teleoperation with xbox360 wireless controller (xbox360 controller+joy)]] | ||
| + | |||
| + | |} | ||
| + | ---- | ||
| − | |||
[[Mobile manipulation | < go back to main]] | [[Mobile manipulation | < go back to main]] | ||
Latest revision as of 11:11, 29 September 2014
Previous steps
Installation of moveIt!
MoveIt! is a package that provides a software tool for all types of manipulation tasks both industrial level and domestic level. It is available for the ROS distributions groovy and hydro, for this reason we must have installed some of these. We will execute the next command in a terminal in order to install moveIt!, where "ROS_DISTRIBUCION" is our installed distribution:
sudo apt-get install ros-ROS_DISTRIBUCION-moveit-fullModification of MYRAbot model for moveIt!
New URDF of the arm
We need to modify the type of the gazebo controllers of the arm's joints in order to allow to moveIt! to take the control of these. Also we have added the 3D meshes of the real components of the arm. We will create a file named "brazo-macros_moveit.xacro" within the folder "urdf" of the package "brazo_fer_modelo" with the content that is shown below:
<?xml version="1.0"?>

<robot xmlns:controller="http://playerstage.sourceforge.net/gazebo/xmlschema/#controller" xmlns:xacro="http://ros.org/wiki/xacro">

  <property name="M_PI" value="3.14159"/>
  <property name="M_SCALE" value="0.001"/>
  <property name="F10_HEIGHT" value="0.004"/>
  <property name="F4_HEIGHT" value="0.0525"/>
  <property name="F3_HEIGHT" value="0.009"/>
  <property name="AX12_HEIGHT" value="0.0385"/>
  <property name="AX12_WIDTH" value="0.038"/>
  <property name="F2_HEIGHT" value="0.0265"/>

  <material name="white">
    <color rgba="0.87 0.90 0.87 1.0"/>
  </material>
  <material name="black">
    <color rgba="0.0 0.0 0.0 1.0"/>
  </material>

<xacro:macro name="default_inertia">
      <inertia ixx="0.001" ixy="0.0" ixz="0.0" iyy="0.001" iyz="0.0" izz="0.001"/>
</xacro:macro>

<xacro:macro name="default_inertia_servos">
      <inertia ixx="0.01" ixy="0.0" ixz="0.0" iyy="0.01" iyz="0.0" izz="0.01"/>
</xacro:macro>

<xacro:macro name="default_dynamics">
      <dynamics fricction="0" damping="0" />
</xacro:macro>

  <xacro:macro name="bioloid_F10_fixed" params="parent name color *origin">
    <joint name="${name}_joint" type="fixed">
      <insert_block name="origin" />
      <parent link="${parent}"/>
      <child link="${name}_link" />
    </joint>

    <link name="${name}_link">
      <inertial>
        <mass value="0.001" />
        <origin xyz="0 0 0" />
		<default_inertia/>
      </inertial>

      <visual>
        <origin xyz=" 0 0 0 " rpy="0 0 0" />
        <geometry>
          <mesh filename="package:/brazo_fer_modelo/meshes/F10.stl" scale="${M_SCALE} ${M_SCALE} ${M_SCALE}"/>
        </geometry>
        <material name="${color}"/>
      </visual>

      <collision>
        <origin xyz=" 0 0 0 " rpy="0 0 0" />
        <geometry>
          <mesh filename="package://brazo_fer_modelo/meshes/F10.stl" scale="${M_SCALE} ${M_SCALE} ${M_SCALE}"/>
        </geometry>
      </collision>
    </link>
  </xacro:macro>

  <xacro:macro name="finger_fixed" params="parent name color *origin">
    <joint name="${name}_joint" type="fixed">
      <insert_block name="origin" />
      <parent link="${parent}"/>
      <child link="${name}_link" />
    </joint>

    <link name="${name}_link">
      <inertial>
        <mass value="0.001" />
        <origin xyz="0 0 0" />
		<default_inertia/>
      </inertial>

      <visual>
        <origin xyz=" 0.03075 0.0 0.001 " rpy="0 0 0" />
        <geometry>
          <box size="0.0865 0.038 0.002" />
        </geometry>
        <material name="${color}"/>
      </visual>

      <collision>
        <origin xyz=" 0.03075 0.0 0.001 " rpy="0 0 0" />
        <geometry>
          <box size="0.0865 0.038 0.002" />
        </geometry>
      </collision>
    </link>
  </xacro:macro>

  <xacro:macro name="bioloid_F3_fixed" params="parent name color *origin">
    <joint name="${name}_joint" type="fixed">
      <insert_block name="origin" />
      <parent link="${parent}"/>
      <child link="${name}_link" />
    </joint>

    <link name="${name}_link">
      <inertial>
        <mass value="0.001" />
        <origin xyz="0 0 0" />
		<default_inertia/>
      </inertial>

      <visual>
        <origin xyz=" 0 0 0 " rpy="0 0 0" />
        <geometry>
          <mesh filename="package://brazo_fer_modelo/meshes/F3.stl" scale="${M_SCALE} ${M_SCALE} ${M_SCALE}"/>
        </geometry>
        <material name="${color}"/>
      </visual>

      <collision>
        <origin xyz=" 0 0 0 " rpy="0 0 0" />
        <geometry>
          <mesh filename="package://brazo_fer_modelo/meshes/F3.stl" scale="${M_SCALE} ${M_SCALE} ${M_SCALE}"/>
        </geometry>
      </collision>
    </link>
  </xacro:macro>

  <xacro:macro name="dynamixel_AX12_fixed" params="parent name *origin">
    <joint name="${name}_joint" type="fixed">
      <insert_block name="origin" />
      <parent link="${parent}"/>
      <child link="${name}_link" />
    </joint>

    <link name="${name}_link">
      <inertial>
        <mass value="0.055" />
        <origin xyz="0 0 0" />
		<default_inertia_servos/>
      </inertial>

      <visual>
        <origin xyz="0 0 0" rpy="0 0 0" />
        <geometry>
          <mesh filename="package:/brazo_fer_modelo/meshes/ax12_box.stl" scale="${M_SCALE} ${M_SCALE} ${M_SCALE}"/>
        </geometry>
        <material name="black"/>
      </visual>

      <collision>
        <origin xyz="0 0 0" rpy="0 0 0" />
        <geometry>
          <mesh filename="package:/brazo_fer_modelo/meshes/ax12_box.stl" scale="${M_SCALE} ${M_SCALE} ${M_SCALE}"/>
        </geometry>
      </collision>
    </link>
  </xacro:macro>

  <xacro:macro name="bioloid_F3_revolute" params="parent name color llimit ulimit vlimit *origin">
    <joint name="${name}" type="revolute">
      <insert_block name="origin" />
      <axis xyz="0 0 -1"/>
      <limit effort="100" velocity="${vlimit}" lower="${llimit}" upper="${ulimit}" />
	  <default_dynamics/>
      <parent link="${parent}"/>
      <child link="${name}_brazo_link" />
    </joint>

    <link name="${name}_brazo_link">
      <inertial>
        <mass value="0.001" />
        <origin xyz="0 0 0" />
		<default_inertia/>
      </inertial>

      <visual>
        <origin xyz=" 0 0 0 " rpy="0 0 0" />
        <geometry>
          <mesh filename="package://brazo_fer_modelo/meshes/F3.stl" scale="${M_SCALE} ${M_SCALE} ${M_SCALE}"/>
        </geometry>
        <material name="${color}"/>
      </visual>

      <collision>
        <origin xyz=" 0 0 0 " rpy="0 0 0" />
        <geometry>
          <mesh filename="package://brazo_fer_modelo/meshes/F3.stl" scale="${M_SCALE} ${M_SCALE} ${M_SCALE}"/>
        </geometry>
      </collision>
    </link>
  </xacro:macro>

  <xacro:macro name="bioloid_F2_revolute" params="parent name color llimit ulimit vlimit *origin">
    <joint name="${name}" type="revolute">
      <insert_block name="origin" />
      <axis xyz="0 1 0"/>
      <limit effort="100" velocity="${vlimit}" lower="${llimit}" upper="${ulimit}" />
	  <default_dynamics/>
      <parent link="${parent}"/>
      <child link="${name}_link" />
    </joint>

    <link name="${name}_link">
      <inertial>
        <mass value="0.001" />
        <origin xyz="0 0 0" />
		<default_inertia/>
      </inertial>

      <visual>
        <origin xyz=" 0 0 0 " rpy="0 0 0" />
        <geometry>
          <mesh filename="package://brazo_fer_modelo/meshes/F2.stl" scale="${M_SCALE} ${M_SCALE} ${M_SCALE}"/>
        </geometry>
        <material name="${color}"/>
      </visual>

      <collision>
        <origin xyz=" 0 0 0 " rpy="0 0 0" />
        <geometry>
          <mesh filename="package://brazo_fer_modelo/meshes/F2.stl" scale="${M_SCALE} ${M_SCALE} ${M_SCALE}"/>
        </geometry>
      </collision>
    </link>
  </xacro:macro>

  <xacro:macro name="bioloid_F4_revolute" params="parent name color llimit ulimit vlimit *origin">
    <joint name="${name}" type="revolute">
      <insert_block name="origin" />
      <axis xyz="0 1 0"/>
      <limit effort="100" velocity="${vlimit}" lower="${llimit}" upper="${ulimit}" />
	  <default_dynamics/>
      <parent link="${parent}"/>
      <child link="${name}_link" />
    </joint>

    <link name="${name}_link">
      <inertial>
        <mass value="0.001" />
        <origin xyz="0 0 0" />
		<default_inertia/>
      </inertial>

      <visual>
        <origin xyz=" 0 0 0 " rpy="0 0 0" />
        <geometry>
          <mesh filename="package://brazo_fer_modelo/meshes/F4.stl" scale="${M_SCALE} ${M_SCALE} ${M_SCALE}"/>
        </geometry>
        <material name="${color}"/>
      </visual>

      <collision>
        <origin xyz=" 0 0 0 " rpy="0 0 0" />
        <geometry>
          <mesh filename="package://brazo_fer_modelo/meshes/F4.stl" scale="${M_SCALE} ${M_SCALE} ${M_SCALE}"/>
        </geometry>
      </collision>
    </link>
  </xacro:macro>

<xacro:macro name="gazebo_propiedades_link" params="nombre material">
  <gazebo reference="${nombre}">
	<mu1>100</mu1>
	<mu2>100</mu2>
	<kp>100000000000</kp>
	<kd>1000000000</kd>
	<material>${material}</material>
    <selfCollide>true</selfCollide>
    <turnGravityOff>false</turnGravityOff>
  </gazebo>
</xacro:macro>

<xacro:macro name="gazebo_propiedades_joint" params="nombre">
 <gazebo reference="${nombre}">
    <erp>0.1</erp>
    <stopKd value="100000000.0" />
    <stopKp value="100000000.0" />
    <fudgeFactor value="0.5" />
 </gazebo>
</xacro:macro>

<gazebo>
  <plugin name="gazebo_ros_control" filename="libgazebo_ros_control.so">

  </plugin>
</gazebo>

  <transmission name="base_trans">
    <type>transmission_interface/SimpleTransmission</type>
    <joint name="base"/>
    <actuator name="base_motor">
      <hardwareInterface>EffortJointInterface</hardwareInterface>
      <mechanicalReduction>1</mechanicalReduction>
    </actuator>
  </transmission>

  <transmission name="arti1_trans">
    <type>transmission_interface/SimpleTransmission</type>
    <joint name="arti1"/>
    <actuator name="arti1_motor">
      <hardwareInterface>EffortJointInterface</hardwareInterface>
      <mechanicalReduction>1</mechanicalReduction>
    </actuator>
  </transmission>

  <transmission name="arti2_trans">
    <type>transmission_interface/SimpleTransmission</type>
    <joint name="arti2"/>
    <actuator name="arti3_motor">
      <hardwareInterface>EffortJointInterface</hardwareInterface>
      <mechanicalReduction>1</mechanicalReduction>
    </actuator>
  </transmission>

  <transmission name="arti3_trans">
    <type>transmission_interface/SimpleTransmission</type>
    <joint name="arti3"/>
    <actuator name="arti3_motor">
      <hardwareInterface>EffortJointInterface</hardwareInterface>
      <mechanicalReduction>1</mechanicalReduction>
    </actuator>
  </transmission>

  <transmission name="pinza_trans">
    <type>transmission_interface/SimpleTransmission</type>
    <joint name="pinza"/>
    <actuator name="pinza_motor">
      <hardwareInterface>EffortJointInterface</hardwareInterface>
      <mechanicalReduction>1</mechanicalReduction>
    </actuator>
  </transmission>

</robot>
We will add the next files within the folder "meshes" of the package "brazo_fer_modelo":
We will create a file named "brazo_moveit.xacro" within the folder "urdf" of the package "brazo_fer_modelo" with the content that is shown below:
<?xml version="1.0"?>

<robot xmlns:xacro="http://ros.org/wiki/xacro">

	<xacro:include filename="$(find brazo_fer_modelo)/urdf/brazo-macros_moveit.xacro" />

<xacro:macro name="brazo" params="parent *origin">

  <joint name="fixed" type="fixed">
    <parent link="${parent}"/>
    <child link="fixed_link"/>
    <insert_block name="origin" />
    <axis xyz="0 0 1" />
  </joint>

  <link name="fixed_link"/>

    <!-- shoulder pan joint -->
    <dynamixel_AX12_fixed parent="fixed_link" name="servo_base">
      <origin xyz="0 0 0.019" rpy="${M_PI/2} 0 ${-M_PI/2}"/>
    </dynamixel_AX12_fixed>
    <bioloid_F3_revolute parent="servo_base_link" name="base" color="white" vlimit="3" llimit="-2.62" ulimit="2.62">
      <origin xyz="0 ${AX12_WIDTH/2} 0" rpy="${-M_PI/2} ${-M_PI/2} ${-M_PI}" />
    </bioloid_F3_revolute>

    <!-- shoulder lift joint -->
    <dynamixel_AX12_fixed parent="base_brazo_link" name="servo_arti1">
      <origin xyz="0 0 ${-AX12_HEIGHT-F10_HEIGHT+0.001}" rpy="0 ${M_PI} 0" />
    </dynamixel_AX12_fixed>
    <bioloid_F4_revolute parent="servo_arti1_link" name="arti1" color="white" vlimit="3" llimit="-2.62" ulimit="2.62">
      <origin xyz="0 0 0" rpy="0 0 0" />
    </bioloid_F4_revolute>
    <bioloid_F10_fixed parent="arti1_link" name="arti1_F10_0" color="white">
      <origin xyz="0 0 ${F4_HEIGHT+F10_HEIGHT/2}" rpy="0 0 0" />
    </bioloid_F10_fixed>
    <bioloid_F10_fixed parent="arti1_F10_0_link" name="arti1_F10_1" color="white">
      <origin xyz="0 0 ${F10_HEIGHT}" rpy="0 0 0" />
    </bioloid_F10_fixed>
    <bioloid_F10_fixed parent="arti1_F10_1_link" name="arti1_F10_2" color="white">
      <origin xyz="0 0 ${F10_HEIGHT}" rpy="0 0 0" />
    </bioloid_F10_fixed>
    <bioloid_F3_fixed parent="arti1_F10_2_link" name="arti1_F3_0" color="white">
      <origin xyz="0 0 ${F10_HEIGHT/2}" rpy="0 ${M_PI} 0" />
    </bioloid_F3_fixed>

    <!-- elbow joint -->
    <dynamixel_AX12_fixed parent="arti1_F3_0_link" name="servo_arti2">
      <origin xyz="0 0 ${-AX12_HEIGHT-F10_HEIGHT+0.001}" rpy="0 ${M_PI} 0"/>
    </dynamixel_AX12_fixed>
    <bioloid_F4_revolute parent="servo_arti2_link" name="arti2" color="white" vlimit="3" llimit="-2.63" ulimit="2.63">
      <origin xyz="0 0 0" rpy="0 0 0" />
    </bioloid_F4_revolute>
    <bioloid_F10_fixed parent="arti2_link" name="arti2_F10_0" color="white">
      <origin xyz="0 0 ${F4_HEIGHT+F10_HEIGHT/2}" rpy="0 0 0" />
    </bioloid_F10_fixed>
    <bioloid_F10_fixed parent="arti2_F10_0_link" name="arti2_F10_1" color="white">
      <origin xyz="0 0 ${F10_HEIGHT}" rpy="0 0 0" />
    </bioloid_F10_fixed>
    <bioloid_F10_fixed parent="arti2_F10_1_link" name="arti2_F10_2" color="white">
      <origin xyz="0 0 ${F10_HEIGHT}" rpy="0 0 0" />
    </bioloid_F10_fixed>
    <bioloid_F3_fixed parent="arti2_F10_2_link" name="arti2_F3_0" color="white">
      <origin xyz="0 0 ${F10_HEIGHT/2}" rpy="0 ${M_PI} 0" />
    </bioloid_F3_fixed>

    <!-- wrist joint -->
    <dynamixel_AX12_fixed parent="arti2_F3_0_link" name="servo_arti3">
      <origin xyz="0 0 ${-AX12_HEIGHT-F10_HEIGHT+0.001}" rpy="0 ${M_PI} 0"/>
    </dynamixel_AX12_fixed>
    <bioloid_F2_revolute parent="servo_arti3_link" name="arti3" color="white" vlimit="3" llimit="-2.62" ulimit="2.62">
      <origin xyz="0 0 0" rpy="0 0 0" />
    </bioloid_F2_revolute>
    <bioloid_F3_fixed parent="arti3_link" name="arti3_F3_0" color="white">
      <origin xyz="0 0.016 ${F2_HEIGHT}" rpy="0 ${M_PI} ${-M_PI/2}" />
    </bioloid_F3_fixed>

    <!-- gripper joint -->
    <dynamixel_AX12_fixed parent="arti3_F3_0_link" name="servo_pinza">
      <origin xyz="-0.02275 0 ${-AX12_WIDTH/2}" rpy="${M_PI} ${M_PI/2} 0"/>
    </dynamixel_AX12_fixed>

    <!-- finger 1 -->
    <joint name="pinza" type="revolute">
      <origin xyz="0 0 0" rpy="0 0 0"/>
      <axis xyz="0 1 0"/>
      <limit effort="100" velocity="3" lower="-2.62" upper="2.62" />
      <default_dynamics/>
      <parent link="servo_pinza_link"/>
      <child link="pinza_movil_link" />
    </joint>
    <link name="pinza_movil_link">
      <inertial>
        <mass value="0.001" />
        <origin xyz="0 0 0" />
        <default_inertia/>
      </inertial>
      <visual>
        <origin xyz=" 0 0 0 " rpy="0 0 0" />
        <geometry>
          <mesh filename="package://brazo_fer_modelo/meshes/F2.stl" scale="${M_SCALE} ${M_SCALE} ${M_SCALE}"/>
        </geometry>
        <material name="white"/>
      </visual>
      <collision>
        <origin xyz=" 0 0 0 " rpy="0 0 0" />
        <geometry>
          <mesh filename="package://brazo_fer_modelo/meshes/F2.stl" scale="${M_SCALE} ${M_SCALE} ${M_SCALE}"/>
        </geometry>
      </collision>
    </link>
    <finger_fixed parent="pinza_movil_link" name="pinza_movil_dedo" color="white">
      <origin xyz="0 0 ${F2_HEIGHT}" rpy="0 0 0" />
    </finger_fixed>

    <!-- finger 2 -->
    <bioloid_F3_fixed parent="servo_pinza_link" name="pinza_fija" color="white">
      <origin xyz="0 0 ${-AX12_HEIGHT-F10_HEIGHT+0.001}" rpy="0 ${M_PI} 0" />
    </bioloid_F3_fixed>
    <finger_fixed parent="pinza_fija_link" name="pinza_fija_dedo" color="white">
      <origin xyz="0 0 0" rpy="0 0 ${M_PI}" />
    </finger_fixed>


<gazebo_propiedades_link nombre="servo_base_link" material="brazo_fer/Black" />

<gazebo_propiedades_link nombre="base_brazo_link" material="brazo_fer/White" />

<gazebo_propiedades_link nombre="servo_arti1_link" material="brazo_fer/Black" />

<gazebo_propiedades_link nombre="arti1_link" material="brazo_fer/White" />

<gazebo_propiedades_link nombre="arti1_F10_0_link" material="brazo_fer/White" />

<gazebo_propiedades_link nombre="arti1_F10_1_link" material="brazo_fer/White" />

<gazebo_propiedades_link nombre="arti1_F10_2_link" material="brazo_fer/White" />

<gazebo_propiedades_link nombre="arti1_F3_0_link" material="brazo_fer/White" />

<gazebo_propiedades_link nombre="servo_arti2_link" material="brazo_fer/Black" />

<gazebo_propiedades_link nombre="arti2_link" material="brazo_fer/White" />

<gazebo_propiedades_link nombre="arti2_F10_0_link" material="brazo_fer/White" />

<gazebo_propiedades_link nombre="arti2_F10_1_link" material="brazo_fer/White" />

<gazebo_propiedades_link nombre="arti2_F10_2_link" material="brazo_fer/White" />

<gazebo_propiedades_link nombre="arti2_F3_0_link" material="brazo_fer/White" />

<gazebo_propiedades_link nombre="servo_arti3_link" material="brazo_fer/Black" />

<gazebo_propiedades_link nombre="arti3_link" material="brazo_fer/White" />

<gazebo_propiedades_link nombre="arti3_F3_0_link" material="brazo_fer/White" />

<gazebo_propiedades_link nombre="servo_pinza_link" material="brazo_fer/Black" />

<gazebo_propiedades_link nombre="pinza_movil_link" material="brazo_fer/White" />

<gazebo_propiedades_link nombre="pinza_movil_dedo_link" material="brazo_fer/WhiteTransparent" />

<gazebo_propiedades_link nombre="pinza_fija_link" material="brazo_fer/White" />

<gazebo_propiedades_link nombre="pinza_fija_dedo_link" material="brazo_fer/WhiteTransparent" />


<gazebo_propiedades_joint nombre="base" />

<gazebo_propiedades_joint nombre="arti1" />

<gazebo_propiedades_joint nombre="arti2" />

<gazebo_propiedades_joint nombre="arti3" />

<gazebo_propiedades_joint nombre="pinza" />

</xacro:macro>

</robot>
Controllers for arm simulation
We will create a file named "controller_moveit.yaml" within the folder "config" of the package "brazo_fer_modelo" with the content that is shown below:
  # Publish all joint states -----------------------------------
  joint_state_controller:
    type: joint_state_controller/JointStateController
    publish_rate: 50

  # Position Controllers ---------------------------------------
  pinza_pos_controller:
    type: effort_controllers/JointPositionController
    joint: pinza
    pid: {p: 0.8, i: 0.6, d: 0.3, i_clamp: 1}

  brazo_controller:
    type: effort_controllers/JointTrajectoryController
    joints:
      - arti1
      - arti2
      - arti3
      - base

    gains: # Required because we're controlling an effort interface
      arti1: {p: 1.0, i: 0.6, d: 0.3, i_clamp: 10}
      arti2: {p: 1.0, i: 0.6, d: 0.3, i_clamp: 10}
      arti3: {p: 1.0, i: 0.6, d: 0.3, i_clamp: 10}
      base: {p: 1.0, i: 0.6, d: 0.3, i_clamp: 10}
Controller for the real arm (actionlib-action server)
We need a actionlib-ActionServer that receives the calculated trajectories through a Goal, subscribes the topic "pose_arm" (arm states) and publishes the topic "move_arm" (arm's movement), in order to communicate moveIt! with the arm. We will create a file named "controlador_brazo.cpp" within the folder "src" of the package "brazo_fer" with the content tha is shown below:
#include <ros/ros.h>
#include <ros/time.h>
#include <trajectory_msgs/JointTrajectoryPoint.h>
#include <trajectory_msgs/JointTrajectory.h>
#include <myrabot_arm_base_b/WriteServos.h>
#include <myrabot_arm_base_b/ReadServos.h>
#include <actionlib/server/simple_action_server.h>
#include <control_msgs/FollowJointTrajectoryAction.h>

#define PI 3.14159265

class MYRAbotArm
{
public:

  MYRAbotArm(std::string name) :
    as_(nh_, name, false),
    action_name_(name)
  {
    as_.registerGoalCallback(boost::bind(&MYRAbotArm::goalCB, this));
    as_.registerPreemptCallback(boost::bind(&MYRAbotArm::preemptCB, this));

    sub_pose_arm_ = nh_.subscribe("/pose_arm", 1, &MYRAbotArm::analysisCB, this);

    pub_move_arm_ = nh_.advertise<myrabot_arm_base_b::WriteServos>("/move_arm", 1, this);

    as_.start();
  }

  ~MYRAbotArm(void)
  {
  }

  void goalCB()
  {
	i_ = 0;

	goal_ = as_.acceptNewGoal()->trajectory;
  }

  void preemptCB()
  {
    ROS_INFO("%s: Preempted", action_name_.c_str());
    as_.setPreempted();
  }

  void analysisCB(const myrabot_arm_base_b::ReadServos& arm)
  {
    if (!as_.isActive())
      return;

    ros::Time ahora = ros::Time::now();

    feedback_.header.stamp = ahora;

    feedback_.joint_names.resize(4);
    feedback_.actual.positions.resize(4);
    feedback_.actual.effort.resize(4);

	for (int i = 0; i < 4; i++)
	{
		switch(i)
		{
			case 3:
				feedback_.joint_names[i] = "base_brazo";
				feedback_.actual.positions[i] = ((((arm.posicion.base * 300)/1023)*PI)/180)-2.62;
				feedback_.actual.effort[i] = ((((arm.corriente.base * 300)/1023)*PI)/180)-2.62;
			break;
			case 0:
				feedback_.joint_names[i] = "arti1";
				feedback_.actual.positions[i] = ((((arm.posicion.arti1 * 300)/1023)*PI)/180)-2.62;
				feedback_.actual.effort[i] = ((((arm.corriente.arti1 * 300)/1023)*PI)/180)-2.62;
			break;
			case 1:
				feedback_.joint_names[i] = "arti2";
				feedback_.actual.positions[i] = ((((arm.posicion.arti2 * 300)/1023)*PI)/180)-2.62;
				feedback_.actual.effort[i] = ((((arm.corriente.arti2 * 300)/1023)*PI)/180)-2.62;
			break;
			case 2:
				feedback_.joint_names[i] = "arti3";
				feedback_.actual.positions[i] = ((((arm.posicion.arti3 * 300)/1023)*PI)/180)-2.62;
				feedback_.actual.effort[i] = ((((arm.corriente.arti3 * 300)/1023)*PI)/180)-2.62;
			break;
		}
	}

	puntos_ = goal_.points.size();

	if (i_ != puntos_)
	{

	    	myrabot_arm_base_b::WriteServos move;

	    		if (i_ == 0
	    		    ||((feedback_.actual.positions[0] <= (goal_.points[i_-1].positions[0] + 0.1) && feedback_.actual.positions[0] >= (goal_.points[i_-1].positions[0] - 0.1))
	    		    && (feedback_.actual.positions[1] <= (goal_.points[i_-1].positions[1] + 0.1) && feedback_.actual.positions[1] >= (goal_.points[i_-1].positions[1] - 0.1))
	    		    && (feedback_.actual.positions[2] <= (goal_.points[i_-1].positions[2] + 0.1) && feedback_.actual.positions[2] >= (goal_.points[i_-1].positions[2] - 0.1))
	    		    && (feedback_.actual.positions[3] <= (goal_.points[i_-1].positions[3] + 0.1) && feedback_.actual.positions[3] >= (goal_.points[i_-1].positions[3] - 0.1))))
	    		{
	    			for (int j = 0; j < 4; j++)
	    			{
	    				switch (j)
	    				{
	    				case 3:
	    					move.posicion.base = ((((goal_.points[i_].positions[j]+2.62)*180)/PI)*1023)/300;
	    					move.velocidad.base = abs(goal_.points[i_].velocities[j]*511);
	    					move.par.base = 1;
	    				break;
	    				case 0:
	    					move.posicion.arti1 = ((((goal_.points[i_].positions[j]+2.62)*180)/PI)*1023)/300;
	    					move.velocidad.arti1 = abs(goal_.points[i_].velocities[j]*511);
	    					move.par.arti1 = 1;
	    				break;
	    				case 1:
	    					move.posicion.arti2 = ((((goal_.points[i_].positions[j]+2.62)*180)/PI)*1023)/300;
	    					move.velocidad.arti2 = abs(goal_.points[i_].velocities[j]*511);
	    					move.par.arti2 = 1;
	    				break;
	    				case 2:
	    					move.posicion.arti3 = ((((goal_.points[i_].positions[j]+2.62)*180)/PI)*1023)/300;
	    				        move.velocidad.arti3 = abs(goal_.points[i_].velocities[j]*511);
	    					move.par.arti3 = 1;
	    				break;
	    				}
	    			}

	    			pub_move_arm_.publish(move);

	    			t_inicio = ros::Time::now();
	    		}
	    		else
	    		{
	    			i_ = i_ - 1;
	    		}

	    		ros::Time ahora = ros::Time::now();

	    		ros::Duration duracion(1.0);

	    		if (ahora > (t_inicio + duracion))
	    		{
	    			result_.error_code = -1;
	    	                as_.setAborted(result_);
	    		}

			feedback_.desired = goal_.points[i_];

			feedback_.error.positions.resize(4);

			for (int j = 0; j < 4; j++)
			{
				feedback_.error.positions[j] = feedback_.desired.positions[j] - feedback_.actual.positions[j];
			}

    		i_ ++;
  	}
	else
	{
		result_.error_code = 0;
	        as_.setSucceeded(result_);
	}
	as_.publishFeedback(feedback_);

  }

protected:

  ros::NodeHandle nh_;
  actionlib::SimpleActionServer<control_msgs::FollowJointTrajectoryAction> as_;
  std::string action_name_;
  int puntos_, i_;
  ros::Time t_inicio;
  trajectory_msgs::JointTrajectory goal_;
  control_msgs::FollowJointTrajectoryResult result_;
  control_msgs::FollowJointTrajectoryFeedback feedback_;
  ros::Subscriber sub_pose_arm_;
  ros::Publisher pub_move_arm_;
};

int main(int argc, char** argv)
{
  ros::init(argc, argv, "brazo_controller/follow_join_trajectory");

  MYRAbotArm brazo(ros::this_node::getName());
  ros::spin();

  return 0;
}
We have to add the next code line in the file "CMakeLists.txt" of the package in order to compile and generate the executable:
rosbuild_add_executable(controlador_brazo src/controlador_brazo.cpp)
Also, we need to add the next dependences for the package in the file "manifest.xml":
actionlib
actionlib_msgs
trajectory_msgs
control_msgs
We will execute the next commands in a terminal in order to compile and generate the executable:
roscd brazo_fer
make
New URDF for xtion camera and frame
We have added a frame to MYRAbot in order to place the new asus Xtion PRO LIVE camera which replaces the previous webcam. We will add the next code lines to the file "estructura-myrabot.xacro" placed within the folder "urdf" of the package "myrabot_fer_modelo" in order to add the camera frame:
...

<joint name="soporte_3" type="fixed">
  <parent link="e_soporte_1_link"/>
  <child link="e_soporte_3_link"/>
  <origin xyz="0 0.065 0.61" rpy="0.12 0 0" />
</joint>

<link name="e_soporte_3_link">
    <inertial>
      <mass value="0.01"/>
      <origin rpy="0 0 0" xyz="0.0 -0.065 ${0.06/2}"/>
      <default_inertia_e />
    </inertial>
    <visual>
      <origin rpy="0 0 0" xyz="-0.135 -0.2 -0.03"/>
      <geometry>
        <mesh filename="package://myrabot_fer_modelo/meshes/e_soporte_3.stl" scale="0.001 0.001 0.001"/>
      </geometry>
      <material name="wood" />
    </visual>
    <collision>
      <origin rpy="0 0 0" xyz="-0.135 -0.2 -0.03"/>
      <geometry>
        <mesh filename="package://myrabot_fer_modelo/meshes/e_soporte_3.stl" scale="0.001 0.001 0.001"/>
      </geometry>
    </collision>
  </link>

...

<gazebo_propiedades nombre="e_soporte_3_link" material="myrabot_fer/LightWood" />

...
We will create a file named "xtion.xacro" within the folder "urdf" of the package "myrabot_fer_modelo" with the content that is shown below in order to create the model of the 3D sensor:
<?xml version="1.0"?>
<robot xmlns:xacro="http://ros.org/wiki/xacro">

  <!-- Xacro properties -->
  <xacro:property name="M_SCALE" value="0.001"/>
  <xacro:property name="asus_xtion_pro_depth_rel_rgb_py" value="0.0270" />
  <xacro:property name="asus_xtion_pro_cam_rel_rgb_py"   value="-0.0220" />

  <property name="M_PI" value="3.14159"/>

  <!-- Parameterised in part by the values in turtlebot_properties.urdf.xacro -->
  <xacro:macro name="xtion" params="parent *origin">

    <joint name="camera_rgb_joint_xtion" type="fixed">
	  <insert_block name="origin" />
      <parent link="${parent}"/>
      <child link="camera_rgb_frame_xtion" />
    </joint>

    <link name="camera_rgb_frame_xtion">
      <inertial>
        <mass value="0.001" />
        <origin xyz="0 0 0" />
        <inertia ixx="0.0001" ixy="0.0" ixz="0.0"
          iyy="0.0001" iyz="0.0"
          izz="0.0001" />
      </inertial>
    </link>

    <joint name="camera_rgb_optical_joint_xtion" type="fixed">
      <origin xyz="0 0 0" rpy="${-M_PI/2} 0 ${-M_PI/2}" />
      <parent link="camera_rgb_frame_xtion" />
      <child link="camera_rgb_optical_frame_xtion" />
    </joint>

    <link name="camera_rgb_optical_frame_xtion">
      <inertial>
        <mass value="0.001" />
        <origin xyz="0 0 0" />
        <inertia ixx="0.0001" ixy="0.0" ixz="0.0"
          iyy="0.0001" iyz="0.0"
          izz="0.0001" />
      </inertial>
    </link>

    <joint name="camera_joint_xtion" type="fixed">
      <origin xyz="0.0175 ${asus_xtion_pro_cam_rel_rgb_py} 0.021"
              rpy="0 0 0"/>
      <parent link="camera_rgb_frame_xtion"/>
      <child link="camera_link_xtion"/>
    </joint>
    <link name="camera_link_xtion">
      <visual>
        <origin xyz="-0.01 0 0" rpy="${-M_PI/2} -${M_PI} ${-M_PI/2}"/>
        <geometry>
          <mesh filename="package://myrabot_fer_modelo/meshes/asus_xtion_pro_live.dae" scale="${M_SCALE} ${M_SCALE} ${M_SCALE}"/>
        </geometry>
      </visual>
      <collision>
        <origin xyz="-0.01 0 0" rpy="${-M_PI/2} -${M_PI} ${-M_PI/2}"/>
        <geometry>
          <mesh filename="package://myrabot_fer_modelo/meshes/asus_xtion_pro_live.dae" scale="${M_SCALE} ${M_SCALE} ${M_SCALE}"/>
        </geometry>
      </collision>
      <inertial>
        <mass value="0.01" />
        <origin xyz="0 0 0" />
        <inertia ixx="0.001" ixy="0.0" ixz="0.0"
          iyy="0.001" iyz="0.0"
          izz="0.001" />
      </inertial>
    </link>

    <joint name="camera_depth_joint_xtion" type="fixed">
      <origin xyz="0.0175 ${asus_xtion_pro_depth_rel_rgb_py} 0.021" rpy="0 0 0" />
      <parent link="camera_rgb_frame_xtion" />
      <child link="camera_depth_frame_xtion" />
    </joint>

    <link name="camera_depth_frame_xtion">
      <inertial>
        <mass value="0.01" />
        <origin xyz="0 0 0" />
        <inertia ixx="0.001" ixy="0.0" ixz="0.0"
          iyy="0.001" iyz="0.0"
          izz="0.001" />
      </inertial>
    </link>

    <joint name="camera_depth_optical_joint_xtion" type="fixed">
      <origin xyz="0 0 0" rpy="${-M_PI/2} 0 ${-M_PI/2}" />
      <parent link="camera_depth_frame_xtion" />
      <child link="camera_depth_optical_frame_xtion" />
    </joint>

    <link name="camera_depth_optical_frame_xtion">
      <inertial>
        <mass value="0.001" />
        <origin xyz="0 0 0" />
        <inertia ixx="0.0001" ixy="0.0" ixz="0.0"
          iyy="0.0001" iyz="0.0"
          izz="0.0001" />
      </inertial>
    </link>

    <gazebo reference="camera_link_xtion">
      <sensor type="depth" name="xtion">
        <always_on>true</always_on>
        <update_rate>20.0</update_rate>
        <camera>
          <horizontal_fov>${60.0*M_PI/180.0}</horizontal_fov>
          <image>
            <format>R8G8B8</format>
            <width>640</width>
            <height>480</height>
          </image>
          <clip>
            <near>0.05</near>
            <far>8.0</far>
          </clip>
        </camera>
        <plugin name="xtion_camera_controller" filename="libgazebo_ros_openni_kinect.so">
          <cameraName>xtion</cameraName>
          <alwaysOn>true</alwaysOn>
          <updateRate>10</updateRate>
          <imageTopicName>rgb/image_raw</imageTopicName>
          <depthImageTopicName>depth/image_raw</depthImageTopicName>
          <pointCloudTopicName>depth/points</pointCloudTopicName>
          <cameraInfoTopicName>rgb/camera_info</cameraInfoTopicName>
          <depthImageCameraInfoTopicName>depth/camera_info</depthImageCameraInfoTopicName>
          <frameName>camera_depth_optical_frame_xtion</frameName>
          <baseline>0.1</baseline>
          <distortion_k1>0.0</distortion_k1>
          <distortion_k2>0.0</distortion_k2>
          <distortion_k3>0.0</distortion_k3>
          <distortion_t1>0.0</distortion_t1>
          <distortion_t2>0.0</distortion_t2>
          <pointCloudCutoff>0.4</pointCloudCutoff>
        </plugin>
      </sensor>
    </gazebo>

  </xacro:macro>
</robot>
We will add the next files within the folder "meshes" of the package "myrabot_fer_modelo":
New URDF of MYRAbot
As well we have to create a file named "myrabot_moveit.urdf.xacro" within the folder "urdf" of the package "myrabot_fer_modelo" with the content that is show below in order to add to the MYRAbot model the new arm model:
<?xml version="1.0"?>

<robot name="MYRAbot"
       xmlns:xi="http://www.w3.org/2001/XInclude"
       xmlns:gazebo="http://playerstage.sourceforge.net/gazebo/xmlschema/#gz"
       xmlns:model="http://playerstage.sourceforge.net/gazebo/xmlschema/#model"
       xmlns:sensor="http://playerstage.sourceforge.net/gazebo/xmlschema/#sensor"
       xmlns:body="http://playerstage.sourceforge.net/gazebo/xmlschema/#body"
       xmlns:geom="http://playerstage.sourceforge.net/gazebo/xmlschema/#geom"
       xmlns:joint="http://playerstage.sourceforge.net/gazebo/xmlschema/#joint"
       xmlns:interface="http://playerstage.sourceforge.net/gazebo/xmlschema/#interface"
       xmlns:rendering="http://playerstage.sourceforge.net/gazebo/xmlschema/#rendering"
       xmlns:renderable="http://playerstage.sourceforge.net/gazebo/xmlschema/#renderable"
       xmlns:controller="http://playerstage.sourceforge.net/gazebo/xmlschema/#controller"
       xmlns:physics="http://playerstage.sourceforge.net/gazebo/xmlschema/#physics"
       xmlns:xacro="http://ros.org/wiki/xacro">

	<xacro:include filename="$(find myrabot_fer_modelo)/urdf/roomba.xacro" />

	<xacro:include filename="$(find myrabot_fer_modelo)/urdf/estructura-myrabot.xacro" />

	<xacro:include filename="$(find myrabot_fer_modelo)/urdf/kinect.xacro" />

	<xacro:include filename="$(find brazo_fer_modelo)/urdf/brazo_moveit.xacro" />

	<xacro:include filename="$(find myrabot_fer_modelo)/urdf/xtion.xacro" />

	<xacro:include filename="$(find myrabot_fer_modelo)/urdf/ultrasonidos.xacro" />

	<roomba />

	<estructura_myrabot parent="base_link">
		<origin rpy="0 0 1.57" xyz="0 0 0.063"/>
	</estructura_myrabot>

	<kinect parent="e_base_kinect_link">
		<origin rpy="0 0 -1.57" xyz="0 -0.045 0.112"/>
	</kinect>

	<brazo parent="e_base_brazo_1_link">
		<origin rpy="0 0 1.57" xyz="0 -0.1015 0.075"/>
	</brazo>

	<xtion parent="e_soporte_3_link">
		<origin rpy="0 0.65 -1.57" xyz="0.021 -0.03 0.175"/>
	</xtion>

	<ultrasonidos id="1" parent="e_base_2_link" d_centro="0.150">
		<origin rpy="0 0 1.57" xyz="0 0 ${0.04-0.007}"/>
	</ultrasonidos>

	<ultrasonidos id="2" parent="e_base_2_link" d_centro="0.150">
		<origin rpy="0 0 2.36" xyz="0 0 ${0.04-0.007}"/>
	</ultrasonidos>

	<ultrasonidos id="3" parent="e_base_2_link" d_centro="0.150">
		<origin rpy="0 0 3.14" xyz="0 0 ${0.04-0.007}"/>
	</ultrasonidos>

	<ultrasonidos id="4" parent="e_base_2_link" d_centro="0.150">
		<origin rpy="0 0 3.93" xyz="0 0 ${0.04-0.007}"/>
	</ultrasonidos>

	<ultrasonidos id="5" parent="e_base_2_link" d_centro="0.150">
		<origin rpy="0 0 4.71" xyz="0 0 ${0.04-0.007}"/>
	</ultrasonidos>

</robot>
We will create a file named "myrabot_gazebo_moveit.launcher" within the folder "launch" of the package "myrabot_fer_modelo" with the content that is shown below in order to load in gazebo the new robot model adapted to moveIt!:
<launch>

  <include file="$(find gazebo_ros)/launch/empty_world.launch">
    <arg name="paused" value="true"/>
    <arg name="use_sim_time" value="true"/>
    <arg name="debug" value="false"/>
    <arg name="world_name" value="$(find turtlebot_gazebo)/worlds/empty.world"/>
  </include>

  <param name="robot_description" command="$(find xacro)/xacro.py '$(find myrabot_fer_modelo)/urdf/myrabot_moveit.urdf.xacro'" />

  <node name="spawn_myrabot" pkg="gazebo_ros" type="spawn_model" args="-urdf -param robot_description -model MYRAbot" respawn="false" output="screen" />


  <rosparam file="$(find brazo_fer_modelo)/config/controller_moveit.yaml" command="load"/>

  <node name="controller_spawner" pkg="controller_manager" type="spawner" args="pinza_pos_controller brazo_controller joint_state_controller" respawn="false" output="screen" />


  <node name="robot_state_publisher" pkg="robot_state_publisher" type="state_publisher" />


  <node pkg="robot_pose_ekf" type="robot_pose_ekf" name="robot_pose_ekf">
    <param name="freq" value="30.0"/>
    <param name="sensor_timeout" value="1.0"/>
    <param name="publish_tf" value="true"/>
    <param name="odom_used" value="true"/>
    <param name="imu_used" value="false"/>
    <param name="vo_used" value="false"/>
    <param name="output_frame" value="odom"/>
  </node>

  <node pkg="nodelet" type="nodelet" name="pointcloud_throttle" args="load pointcloud_to_laserscan/CloudThrottle openni_manager" respawn="true">
    <param name="max_rate" value="20.0"/>
    <remap from="cloud_in" to="/camera/depth/points"/>
    <remap from="cloud_out" to="cloud_throttled"/>
  </node>

  <node pkg="nodelet" type="nodelet" name="kinect_laser" args="load pointcloud_to_laserscan/CloudToScan openni_manager" respawn="true">
    <param name="output_frame_id" value="/camera_depth_frame"/>
    <!-- heights are in the (optical?) frame of the kinect -->
    <param name="min_height" value="-0.15"/>
    <param name="max_height" value="0.15"/>
    <remap from="cloud" to="/cloud_throttled"/>
  </node>

  <node pkg="nodelet" type="nodelet" name="kinect_laser_narrow" args="load pointcloud_to_laserscan/CloudToScan openni_manager" respawn="true">
    <param name="output_frame_id" value="/camera_depth_frame"/>
    <!-- heights are in the (optical?) frame of the kinect -->
    <param name="min_height" value="-0.025"/>
    <param name="max_height" value="0.025"/>
    <remap from="cloud" to="/cloud_throttled"/>
    <remap from="scan" to="/narrow_scan"/>
  </node>

</launch>
Configuration of MYRAbot in moveIt!
Setup assistant
We will execute the next command in a terminal in order to start the setup assistant of moveIt!:
roslaunch moveit_setup_assistant setup_assistant.launchWe can choose between "Create New MoveIt Configuration Package" or "Edit existing MoveIt Configuration Package" in the assistant window that is shown below:
 MoveIt! setup asistant start window |
Select the URDF file of the MYRAbot model clicking on "Browse" > |
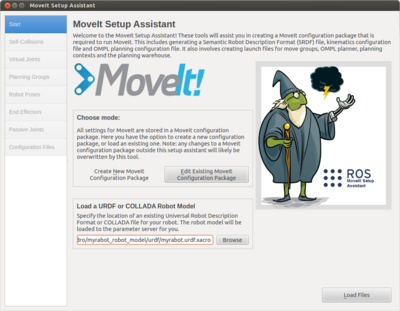 Creation of New moveIt! Configuration Package window |
We will click on "Load Files" in order to load our robot model in the moveIt! setup assistant. When the load process ends, we can see in the right side of the window the robot model. This is shown in the next picture:
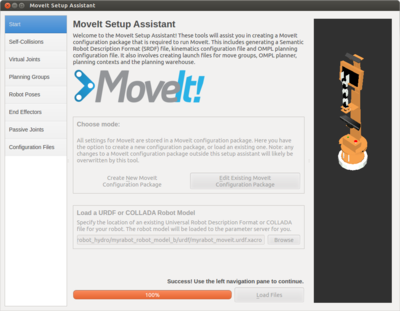
Now, we will select "Self-Collision" in the menu of the left side of the window and we will click on "Regenerate Default Collision Mtrix" in order to calculate the collision matrix of our model. The result is shown in the next picture:
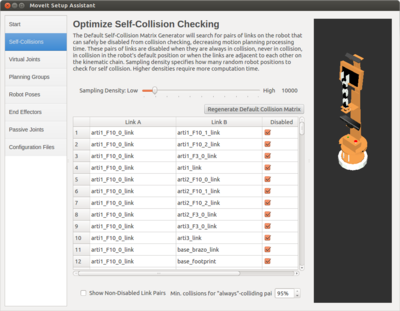
We will select "Virtual Joints" in the menu of the left side of the window and we will click on "Add Virtual Joint". We will write virtual_joint in the field "Virtual Joint Name", we will select the link base_footprint in the field "Child_Link", we will write odom in the field "Parent Frame Name" and we will write planar in the field. The procedure is shown in the next pictures:
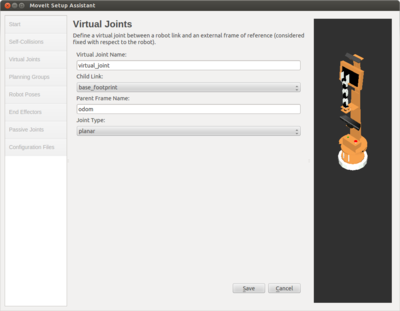 MoveIt! setup assistant "Add Virtual Joint" window |
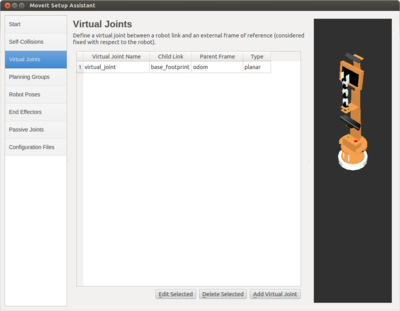 MoveIt! setup assistant "Virtual Joints" window |
We will select "Planning Groups" in the menu of the left side of the window and we will click on "Add Group". We will write brazo in the field "Group Name", we will select kdl_kinematics_plugin/KDLKinematicsPlugin in the field "Kinematic Solver" and we will leave the rest of fields with the default value. The procedure is shown in the next pictures:
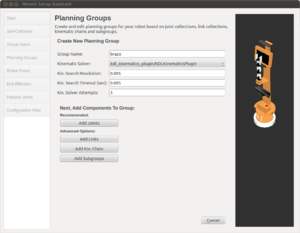 MoveIt! setup assistant "Add Group" window |
Select from the list the joints of the arm (base, arti1, arti2, arti3)> |
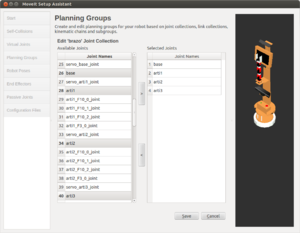 MoveIt! setup assistant "Add Joints" to "Group" window |
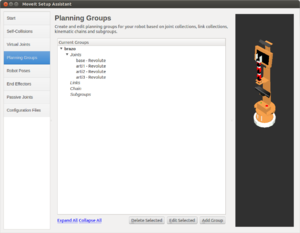 MoveIt! setup assistant "Planning Group" window |
As well we must add the gripper group clicking on "Add Group". We will write pinza in the field "Group Name", we will select None in the field "Kinematic Solver" and we will leave the rest of fields with the default value. The procedure is shown in the next pictures:
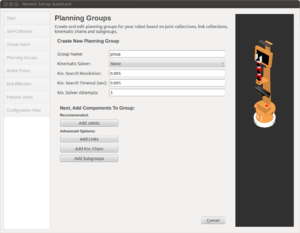 MoveIt! setup assistant "Add Group" window |
Select from the list the links of the gripper> |
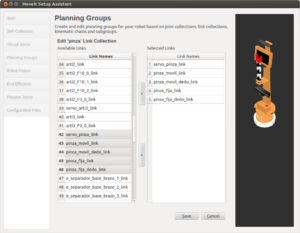 MoveIt! setup assistant "Add Links" to "Group" window |
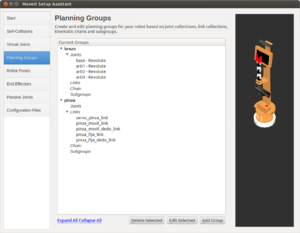 MoveIt! setup assistant "Planning Group" window |
We can store regular poses for the arm group in order to set this poses in the future. We will select "Robot Poses" in the menu of the left side of the window and we will click on "Add Pose". We will write home in the field "Pose Name" and we will select brazo in the field "Planning Group". We can modify the position of each joint using the slider. The procedure is shown in the next pictures:
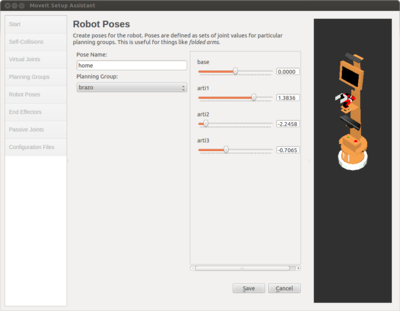 MoveIt! setup assistant "Add Pose" window |
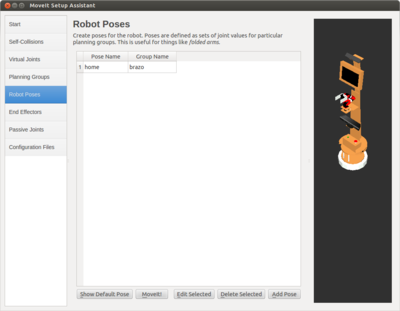 MoveIt! setup assistant "Robot Pose" window |
We will select "End Effectors" in the menu of the left side of the window and we will click on "Add End Effector". We will write pinza_eef in the field "End Effector Name", we will select 'pinza in the field "End Effector Group", we will select arti3_link in the field "Parent Link" and we will leave blank the field "Parent Group". The procedure is shown in the next pictures:
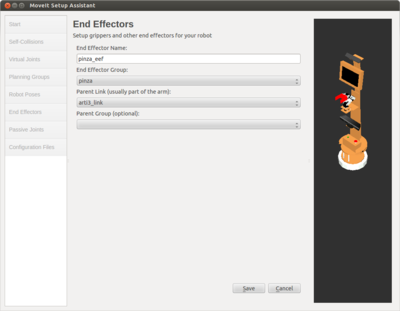 MoveIt! setup assistant "Add End Effector" window |
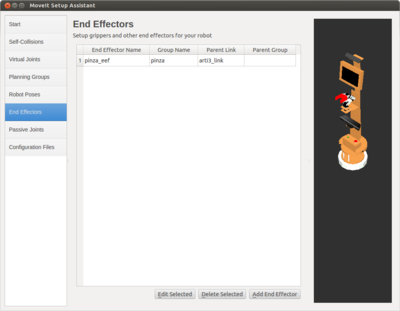 MoveIt! setup assistant "End Effectors" window |
To finish, we will select "Configuration Files" in the menu of the left side of the window and we will click on "Browse" in order to select the path and the name for the configuration package. We will click on "Generate Package" to generate the package. The result is shown in the next picture:
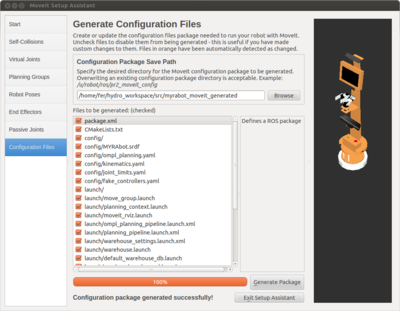
Integration of arm's controllers
We will create a file named "controllers.yaml" within the folder "config" of the generated moveIt! package with the content that is show below:
controller_list:
 - name: brazo_controller
   action_ns: follow_joint_trajectory
   type: FollowJointTrajectory
   default: true
   joints:
     - arti1
     - arti2
     - arti3
     - base
We have to add the nest code lines in the file "MYRAbot_moveit_controller_manager.launch.xml" placed in the folder "launch" of the generated moveIt! package:
<launch>

 <!-- Set the param that trajectory_execution_manager needs to find the controller plugin -->
 <arg name="moveit_controller_manager" default="moveit_simple_controller_manager/MoveItSimpleControllerManager" />
 <param name="moveit_controller_manager" value="$(arg moveit_controller_manager)"/>

 <!-- load controller_list -->
 <rosparam file="$(find myrabot_moveit_generated)/config/controllers.yaml"/>

</launch>
Integration of perception sensors
We can use the asus xtion pro live or the kinect in MYRAbot, we configure both in the same way. We will create a file named "xtion.yaml" within the folder "config" of the generated moveIt! package with the content that is shown below:
sensors:
  - sensor_plugin: occupancy_map_monitor/PointCloudOctomapUpdater
    point_cloud_topic: /xtion/depth/points
    max_range: 5.0
    point_subsample: 1
    padding_offset: 0.1
    padding_scale: 1.0
    filtered_cloud_topic: filtered_cloud
We have to add the nest code lines in the file "MYRAbot_moveit_sensor_manager.launch.xml" placed in the folder "launch" of the generated moveIt! package:
<launch>

 <rosparam command="load" file="$(find myrabot_moveit_generated)/config/xtion.yaml" />
 <param name="octomap_frame" type="string" value="odom" />
 <param name="octomap_resolution" type="double" value="0.05" />
 <param name="max_range" type="double" value="5.0" />

</launch>
We have to add the value 'move_group/MoveGroupGetPlanningSceneService in the parameter "papabilities" in the file "move_group.launch" placed in the folder "launch" of the generated moveIt! package, like is shown below:
...

    <!-- MoveGroup capabilities to load -->
    <param name="capabilities" value="move_group/MoveGroupCartesianPathService
				      move_group/MoveGroupExecuteService
				      move_group/MoveGroupKinematicsService
				      move_group/MoveGroupMoveAction
				      move_group/MoveGroupPickPlaceAction
				      move_group/MoveGroupPlanService
				      move_group/MoveGroupQueryPlannersService
				      move_group/MoveGroupStateValidationService
				      move_group/MoveGroupGetPlanningSceneService
				      " />

...
Modification of the .srdf file generated
We have to edit the generated file "MYRAbot.srdf" placed in the folder "config" of the generated moveIt! package in order to replace the commas by dots in the values of the joints in the stored group poses, like is shown below:
    <group_state name="home" group="brazo">
        <joint name="arti1" value="1,3836" />
        <joint name="arti2" value="-2,2458" />
        <joint name="arti3" value="-0,7065" />
        <joint name="base" value="0" />
    </group_state>

by

    <group_state name="home" group="brazo">
        <joint name="arti1" value="1.3836" />
        <joint name="arti2" value="-2.2458" />
        <joint name="arti3" value="-0.7065" />
        <joint name="base" value="0" />
    </group_state>
Execution
Simple planning
We will execute the next command in a terminal in order to test that the MYRAbot works properly in moveIt!:
roslaunch myrabot_moveit_generated demo.launchWhen the load process finish we can see the MYRAbot model in rviz with the Motion Planning Interface of moveIt!, like is shown in the next picture:
If the interact mode is selected we can see a interactive markers around the gripper. We will use the interactive markers to interact with the representation of the start state and the goal state. If we open Planning Request within of MotionPlanning we can show or hide the representation of Query Start State (arm's joints green-coloured) and Query Goal State (arm's joints orange-coloured). When a part of the arm collides with other part of the robot or other object, its colour change to red.
We can see in the next video a simple planning, without obstacles, that moves the arm from a start pose (stored pose home) until a goal pose (using the interactive marker):
Planning with modelled scene
We will execute the next command in a terminal in order to start rviz with the robot model and the "MotionPlanning" of moveIt!:
roslaunch myrabot_moveit_generated demo.launchWe have created a scene with basic geometry figures that represent a table and a can. We have not used 3D meshes because they may swap randomly. We will create a file named "mesa_lata.scene" within our personal folder with the content that is shown below:
Mesa_Lata
* mesa_pata_izquierda_delantera
1
cylinder
0.015 0.71
0.20 0.97 0.355
0 0 0 1
0 0 0 1
* mesa_pata_derecha_delantera
1
cylinder
0.015 0.71
0.20 -0.97 0.355
0 0 0 1
0 0 0 1
* mesa_pata_derecha_trasera
1
cylinder
0.015 0.71
0.89 -0.97 0.355
0 0 0 1
0 0 0 1
* mesa_pata_izquierda_trasera
1
cylinder
0.015 0.71
0.89 0.97 0.355
0 0 0 1
0 0 0 1
* mesa_tablero
1
box
0.75 2 0.03
0.545 0 0.725
0 0 0 1
0.71372549 0.494117647 0.301960784 1
* lata
1
cylinder
0.03 0.12
0.28 0 0.8
0 0 0 1
1 0 0 1
.
We will load the scene clicking on Import From Text in the menu Scene Objects of MotionPlanning. We can see in the next video the load process and planning to avoid the can that is represents by a red cylinder over the table:
Planning with robot in gazebo
We will create a file named "myrabot_gazebo_moveit_mesa+latas.launch" within the folder "launch" of the package "myrabot_fer_modelo" with the content that is shown below in order to load the objects' models (table and cans):
<launch>

  <include file="$(find myrabot_fer_modelo)/launch/myrabot_gazebo_moveit.launch" />

  <!-- Load models table and cans -->
  <node name="spawn_mesa" pkg="gazebo_ros" type="spawn_model" args="-file $(find myrabot_objects_models_b)/urdf/mesa.urdf -urdf -x 0.545 -y 0 -z 0 -Y -1.57 -model mesa" respawn="false" output="screen" />

  <!--node name="spawn_lata_coca_cola" pkg="gazebo_ros" type="spawn_model" args="-file $(find myrabot_objects_models_b)/urdf/lata_coca_cola.urdf -urdf -x 0.32 -y -0.18 -z 0.74 -Y -1.57 -model lata_Coca_Cola" respawn="false" output="screen" /-->

  <node name="spawn_lata_amstel" pkg="gazebo_ros" type="spawn_model" args="-file $(find myrabot_objects_models_b)/urdf/lata_amstel.urdf -urdf -x 0.32 -y 0.0 -z 0.74 -Y -1.57 -model lata_Amstel" respawn="false" output="screen" />

</launch>
We will create a file named "moveit_planning_execution.launch" within the folder "launch" of the created moveIt! package with the content that is shown below:
<launch>
 # The planning and execution components of MoveIt! configured to
 # publish the current configuration of the robot (simulated or real)
 # and the current state of the world as seen by the planner
 <include file="$(find myrabot_moveit_generated)/launch/move_group.launch">
  <arg name="publish_monitored_planning_scene" value="true" />
 </include>
 # The visualization component of MoveIt!
 <include file="$(find myrabot_moveit_generated)/launch/moveit_rviz.launch"/>
</launch>
We will execute the next command in a terminal in order to start gazebo with the robot model and objects' models:
roslaunch myrabot_fer_modelo myrabot_gazebo_moveit_mesa+latas.launchWe will execute the next command in a new terminal in order to start rviz with the "Motion Planning Interface" of moveIt!:
roslaunch myrabot_moveit_generated moveit_planning_execution.launchThe represented scene in rviz corresponds with the scene captured by the perception sensor, the boxes represent the occupied space. We can see in the next video the planning to avoid the can and the replanning because the first calculated trajectory collides with the can:
Simple planning with real robot
We need load the robot model and start the arm controller for moveIt!. We will create a file named "controlador_moveit.launch" within the folder "launch" of the package "brazo_fer" with the content that is shown below:
<launch>

  <param name="robot_description" command="$(find xacro)/xacro.py '$(find myrabot_fer_modelo)/urdf/myrabot_moveit.urdf.xacro'" />

  <node name="robot_state_publisher" pkg="robot_state_publisher" type="state_publisher"></node>

  <node name="serial_node" pkg="rosserial_python" type="serial_node.py" args="/dev/ttyACM0" />

  <node name="joint_states_brazo" pkg="brazo_fer" type="joint_states_brazo" />

  <group ns="brazo_controller">

    <node name="follow_joint_trajectory" pkg="brazo_fer" type="controlador_moveit" output="screen" />

  </group>

</launch>
We will execute the next command in a terminal in order to start the arm control:
roslaunch brazo_fer controlador_moveit.launchIn a new terminal we will execute the next command in order to start rviz with the "Motion Planning Interface" of moveIt!
roslaunch myrabot_moveit_generated moveit_planning_execution.launchWe can see in the next video the real arm executing the planned trajectories in order to reach the positions that we have indicated on robot model using interactive markers:
